
Grandpa Sol's Bagels - Sourdough 2.0
This week, we started our new Online Course: Everyday Sourdough: Level Two. It’s the inevitable next step from our first course - full of recipes that can be a bit more daunting to tackle on your own, but still great additions to your kitchen. I’ve spent the last few months working on the recipes and trying to find a good mix of challenging, but useful techniques and food I actually want to make and eat.
For those who haven’t ever taken a course with us, I wanted to give you a taste of what you can expect from a Gartur Stitch Farm online course, (oh and I wanted to share these bagels with the wider world because they are so amazing they shouldn’t be behind a paywall!!). Each recipe has a video, a downloadable recipe card, step by step photos and a super friendly Facebook group to ask any questions you may have!!
The course will cover sandwich loaves, pretzels, ciabatta and, my favourite, sourdough croissants…amongst many others. We will give our tips for working at higher hydrations and really get stuck into sourdough baking. I am soooo excited, but not as excited as my family to eat everything.
As I am uploading the course as we go through it this first time, I am offering a special discount for the month of October - £25 for the course (usually £45) or if you’ve never taken a course with us before, you can get Everyday Sourdough Level One 50% off if you buy it with Level Two. No code needed, just head over to the farm shop.
And now on to why you are really here… Grandpa Sol’s Bagels!!

Growing up, my favourite visits were to my Grandpa Goldin. He had a big garden, played the piano and used to make up songs to sing to me. I would tag along as he went about his day, garden centre, farm stands, and the inevitable stop at the Jewish deli for brunch. He would sit around talking to his pals and I would always order one of two things - Matzo ball soup (with matzos as big as your head) or chewy, delicious bagels. He would have the inevitable lox, but I always went for a sweet schmear like cinnamon. I’ve named these bagels after him and those morning bagels.
I have yet to find a bagel here in the UK that matches the taste and texture of a “real” bagel from the US. The offerings here tend to be cakey and fluffy, where the bagels of my youth were chewy and far more substantial. Over my years of sourdough baking, I have never managed to get the recipe right - the taste would be fine, but the rise would be poor or visa versa. However, this recipe is really the winner.
The added chewiness here comes from the addition of vital wheat gluten. Vital wheat gluten made from flour that has been hydrated to make gluten then processed to remove all of the additional starches and sugars. It is then dried and ground back to flour. This extra protein hit gives bagels their chewiness and helps achieve a good rise in breads that may have a lot of additions like seeds and nuts. It can be left out, simply substitute the weight of gluten for more flour.
The other addition here is non-diastatic malt powder. Essentially this is a type of sugar made from sprouted barley. It would’ve been the cheapest form of sugar in large cities where bagels were traditionally sold as it is often a by-product of brewing. This malty flavour is what distinguishes a good bagel from a great one.
INGREDIENTS
100g active starter (or make a levain about 4 hours before with 20g starter and 40g flour and water)
480g flour
15g salt
275g water
40g malt
20g vital wheat gluten
Instructions
I use my stand mixer here, because the dough is quite dry. You certainly don’t have to. Just knead on the counter until you get a nice silky consistency.
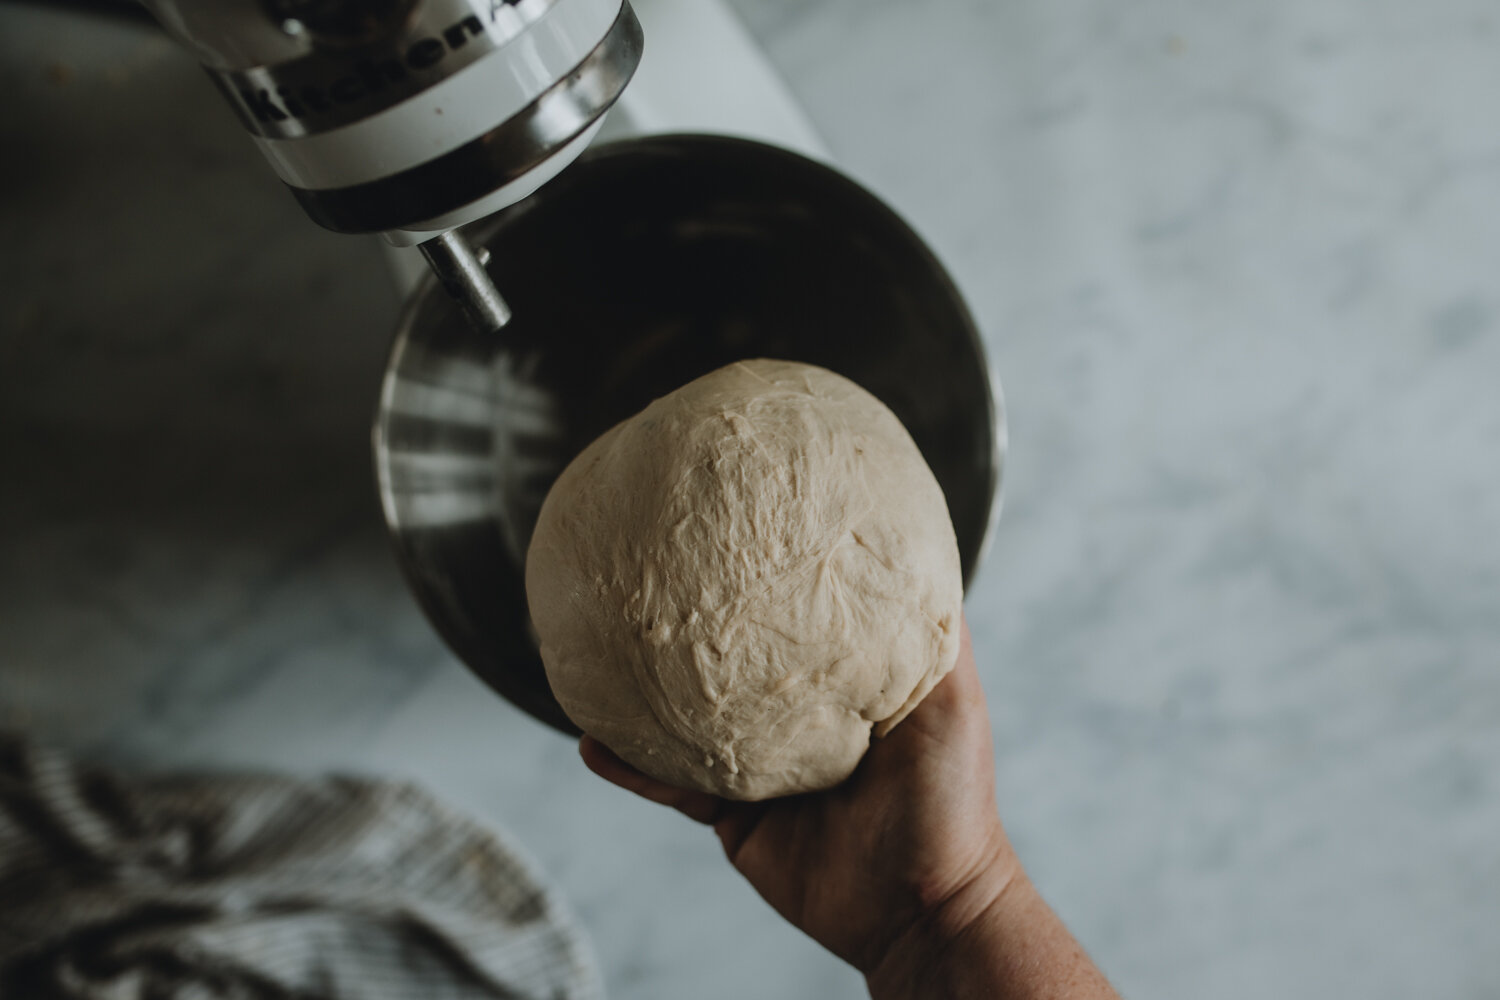
Add all the ingredients, except the salt and mix well. Let it rest for 10-15 minutes
Add the salt and mix or knead until the gluten has developed.
Let rest covered for 3-4 hours, doing 3-4 stretch and folds in that time.
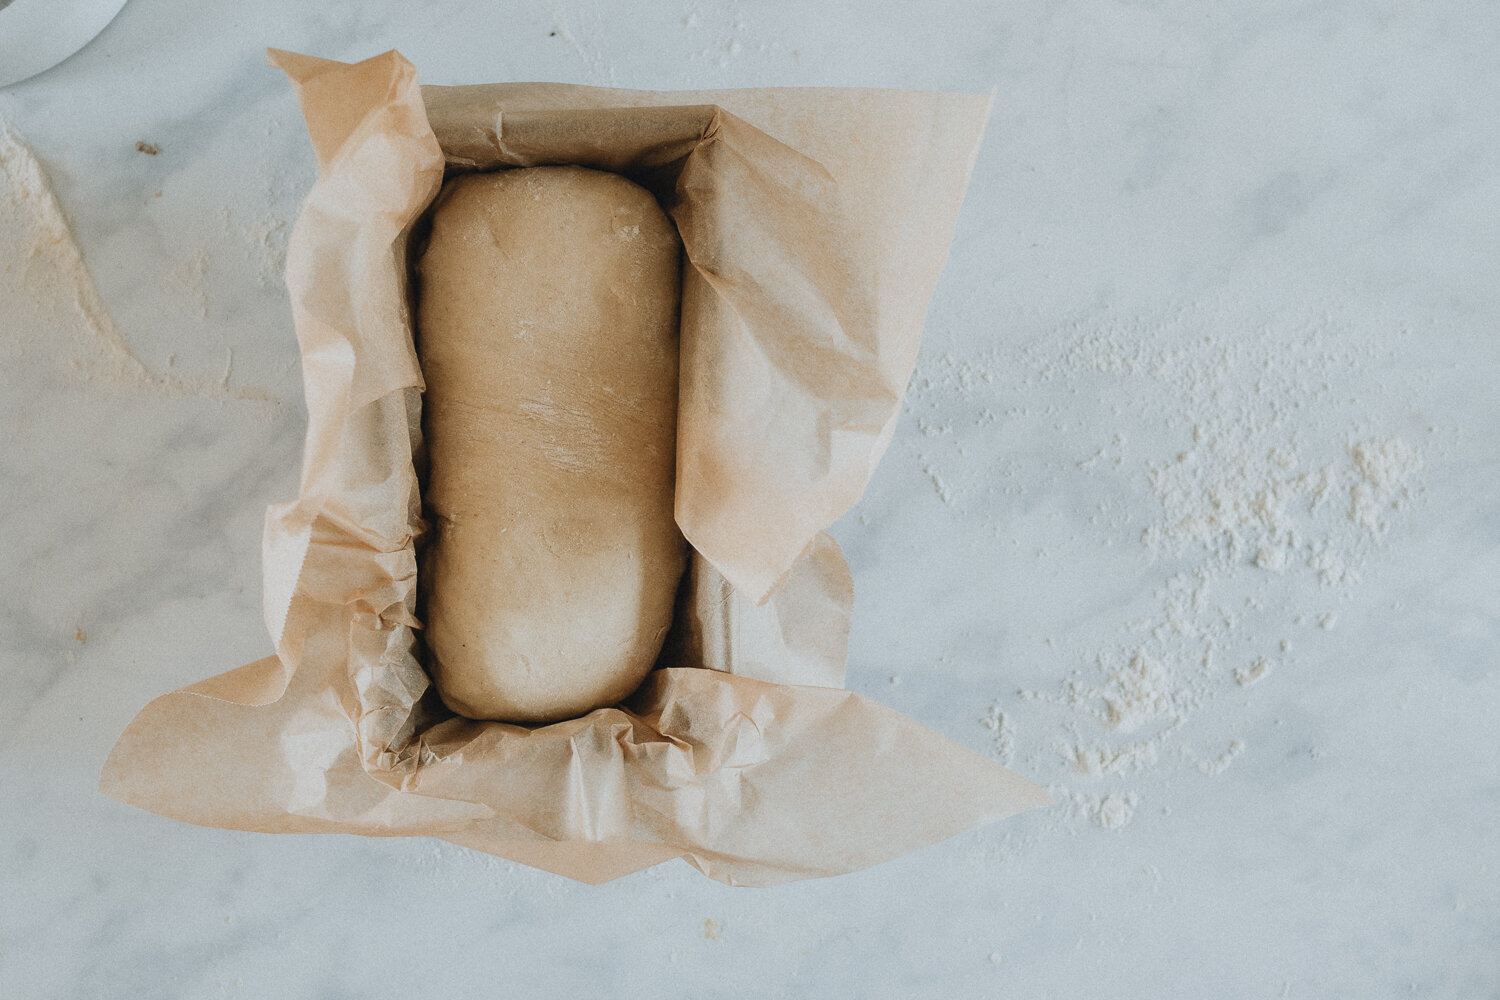
Cover and refrigerate for 12-18 hours.

5. Divide the dough into 12 equal pieces.
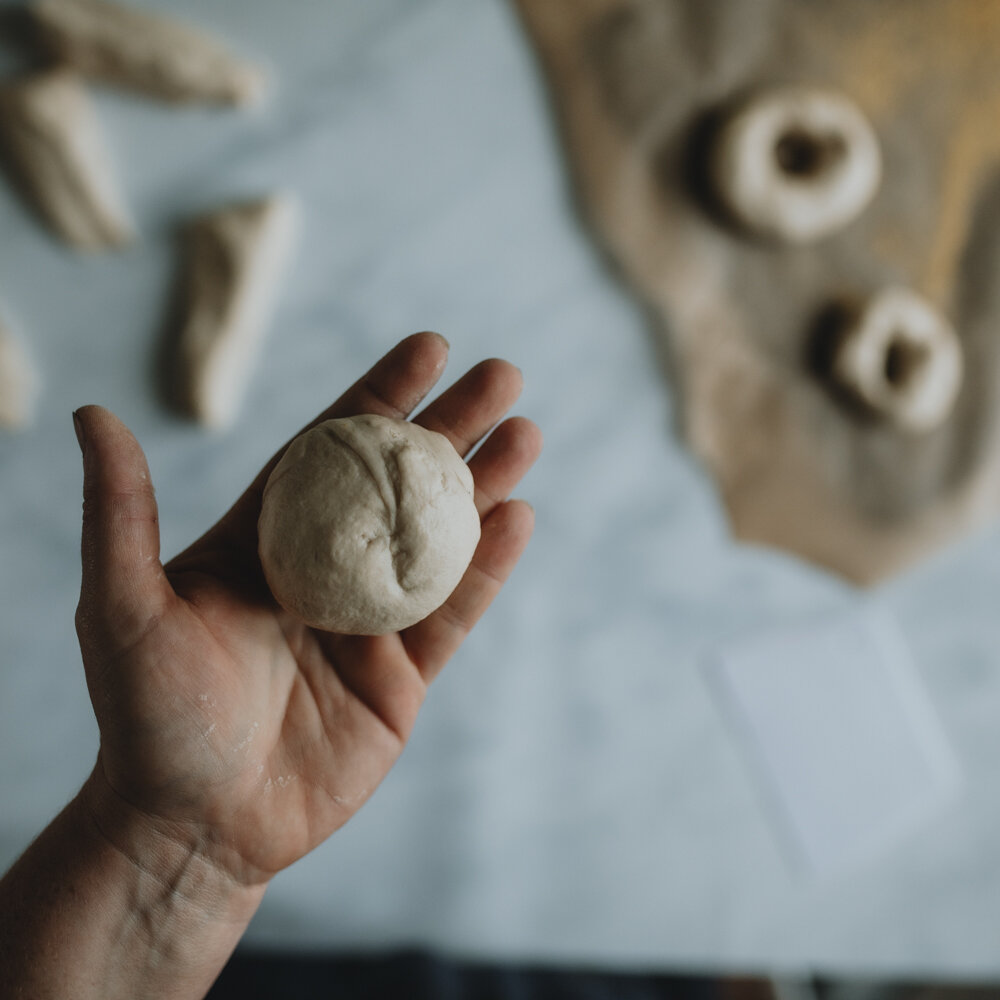
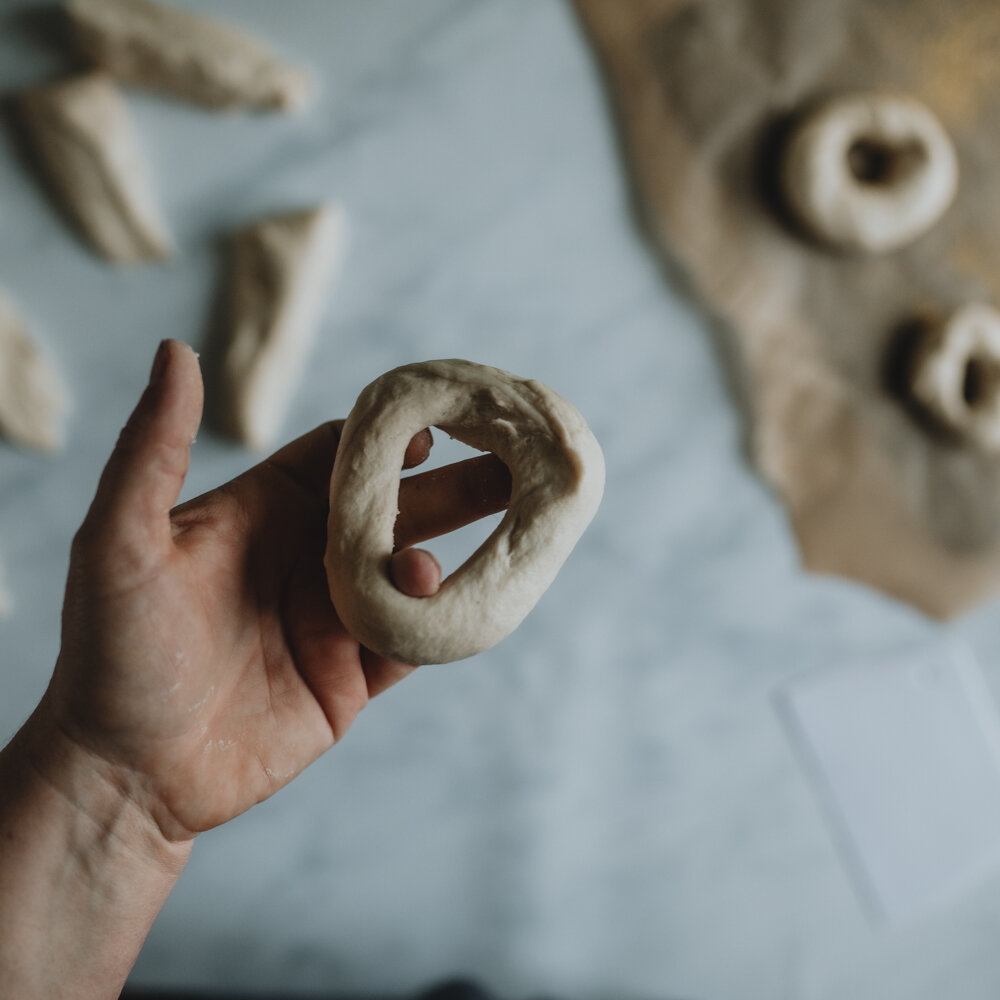
6. Shape. Either by making a ball and poking a hole through and making it gradually larger with your hand
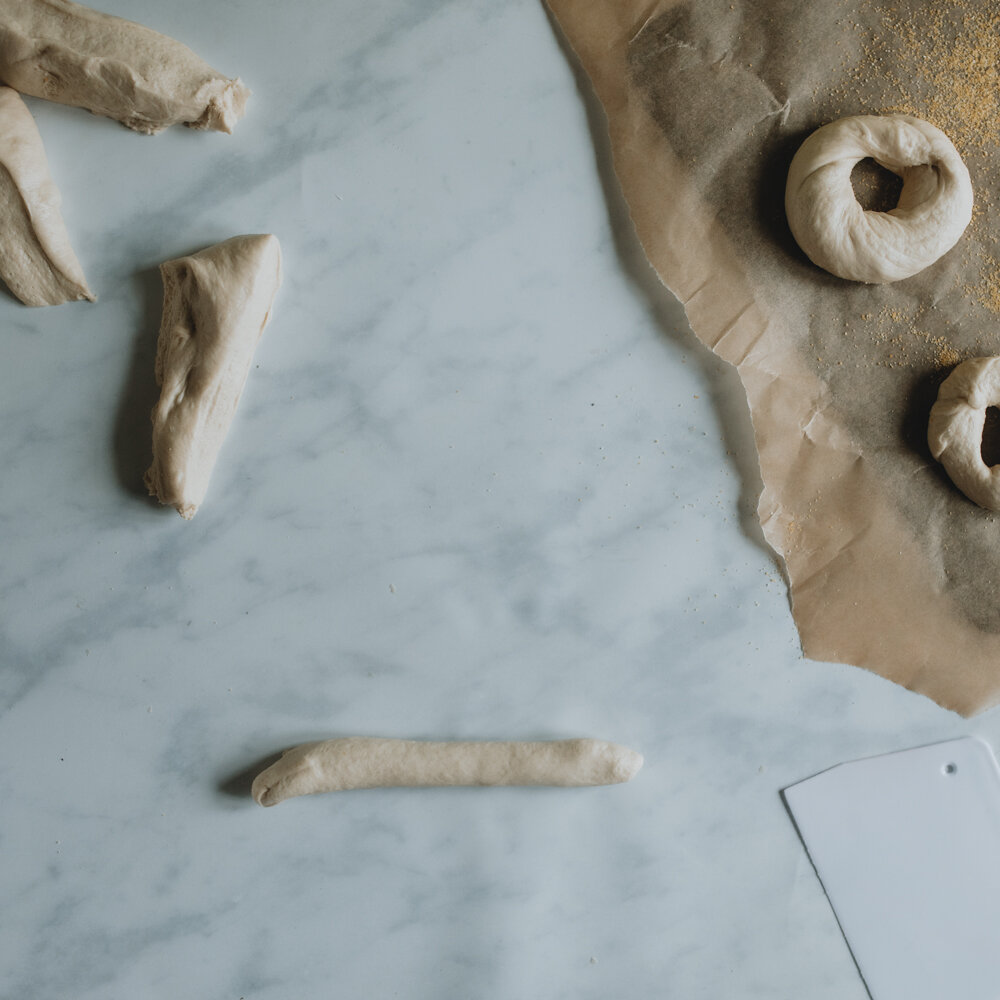
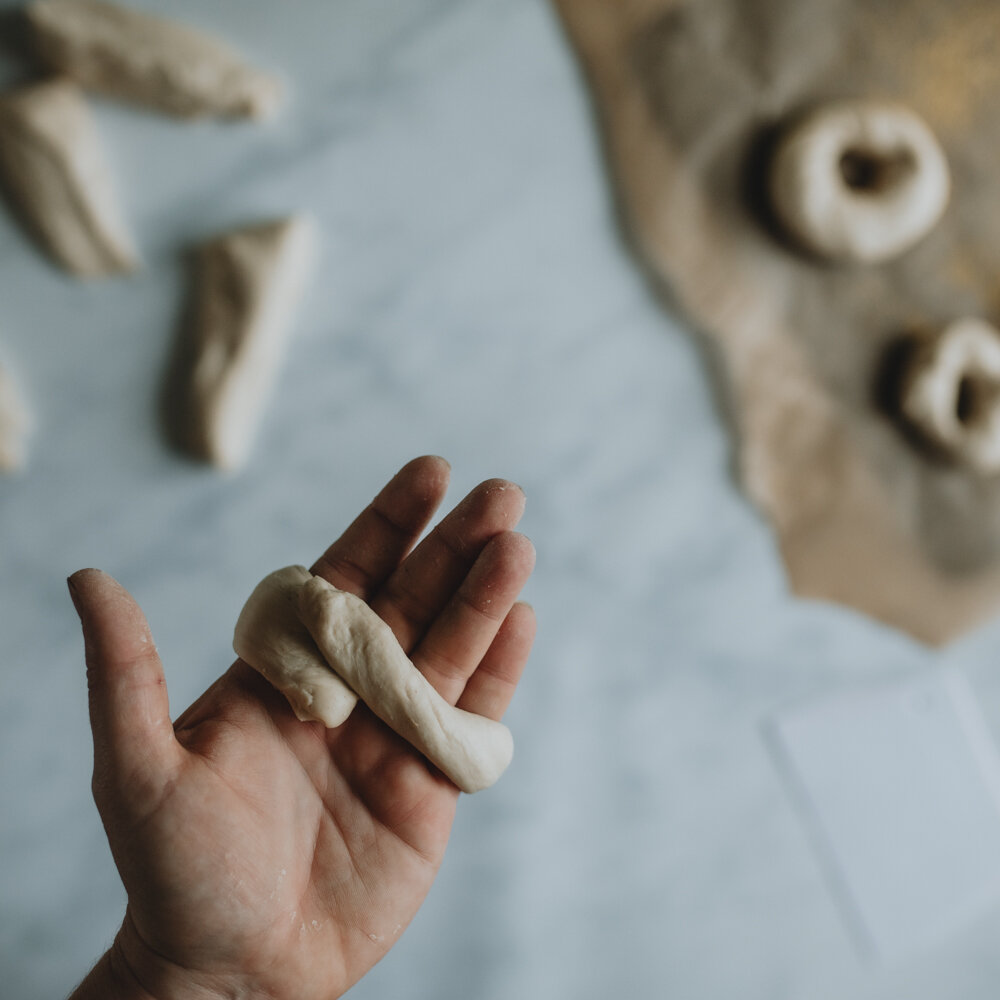

or roll out a 10inch/8cm tube, wrap it around your hand so the ends overlap on your palm and roll the ends together on the bench to seal. Place them on a parchment lined tray, sprinkled with a bit of polenta or flour to help them stop sticking.

7. Cover with a damp cloth and let rise for 30-45 minutes. You will know they are ready to cook when you press a finger print in and it disappears after a few seconds.
8. Preheat your oven to 200c/395f. Set up a tray with a rack near the stove so you can transfer wet bagels onto it to dry.
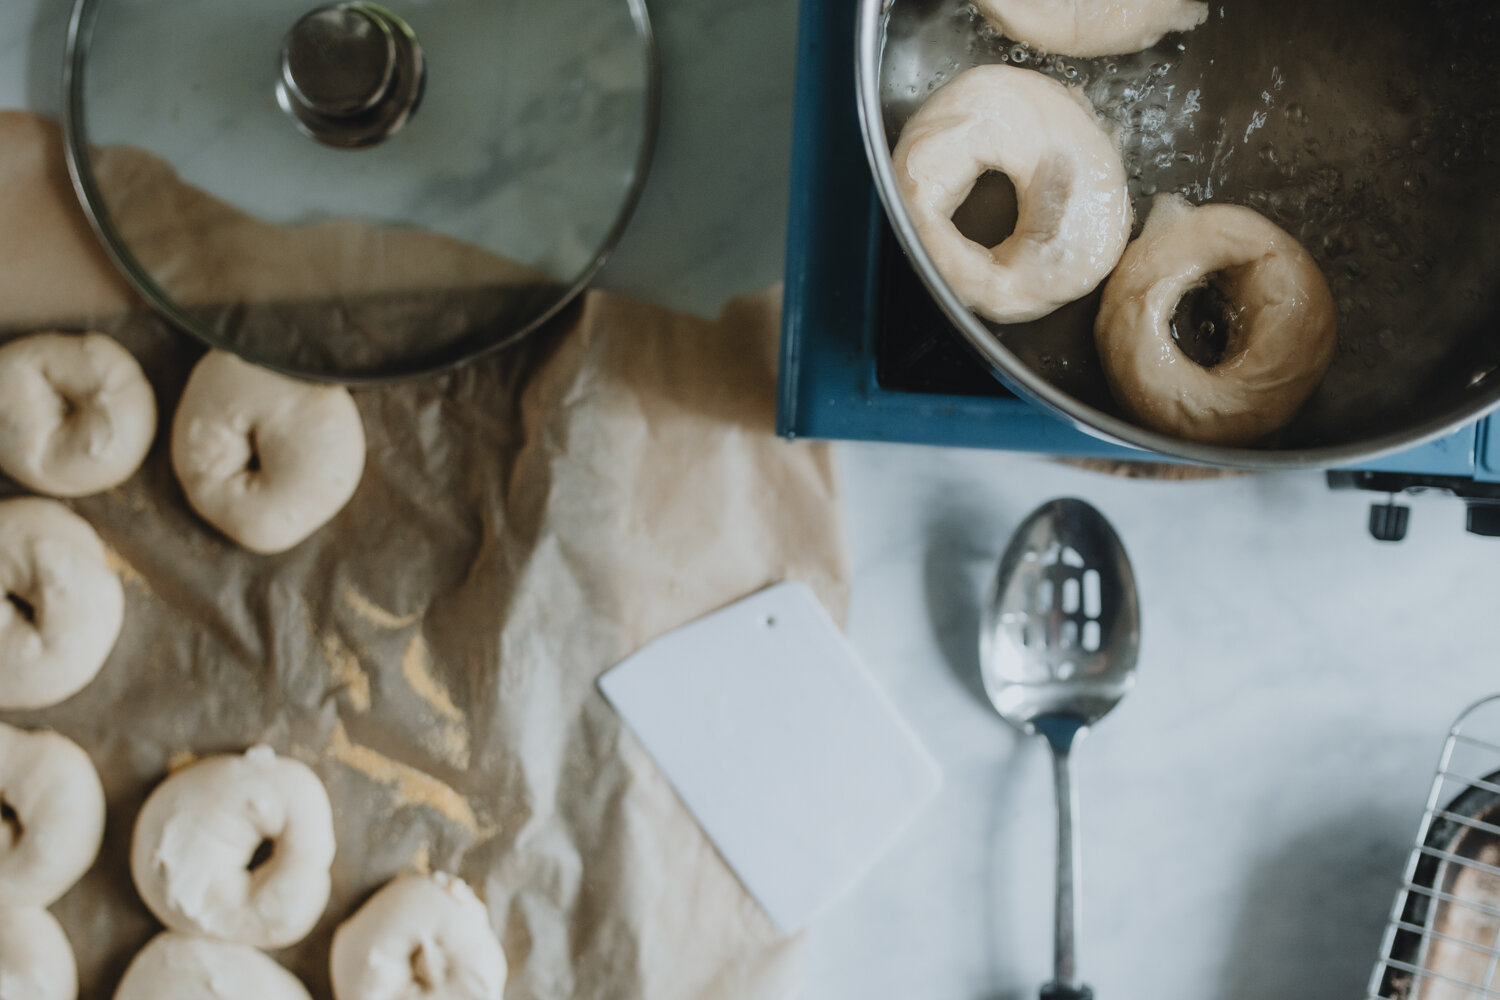
9. Bring a pot of water to a simmer. Place your bagel in for about 60seconds. I find the best rise is given by gently simmering one side for 45 seconds and then quickly turning it over and simmering for another 15 seconds or so.
10.Place you bagels on to your rack to drip off any excess water.
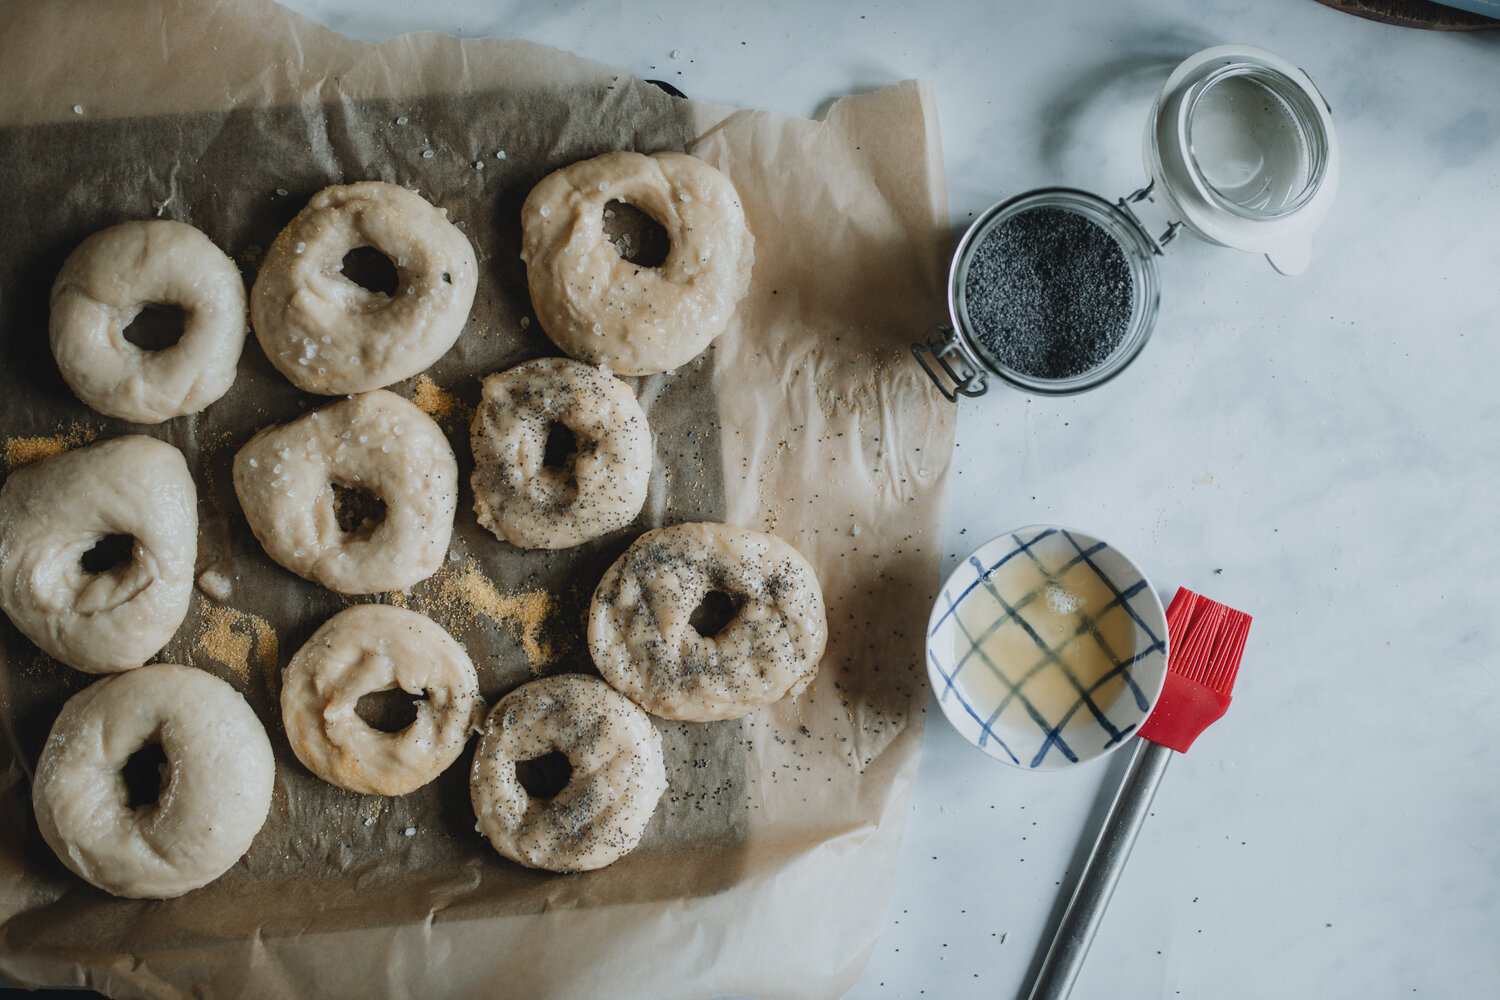
11. Brush your bagels with egg white. This is where you can add any sprinkles. I like salt bagels, but seseme seeds, poppy seeds or other toppings are available.
12. Bake for 20 minutes or so until golden brown.

Grandpa Sol's Bagels

Ingredients
- 100g active starter (or make a levain about 4 hours before with 20g starter and 40g flour and water)
- 480g flour
- 15g salt
- 275g water
- 40g malt
- 20g vital wheat gluten
- I use my stand mixer here, because the dough is quite dry. You certainly don’t have to. Just knead on the counter until you get a nice silky consistency.
Method
- Add all the ingredients, except the salt and mix well. Let it rest for 10-15 minutes
- Add the salt and mix or knead until the gluten has developed.
- Let rest covered for 3-4 hours, doing 3-4 stretch and folds in that time.
- Cover and refrigerate for 12-18 hours.
- Divide the dough into 12 equal pieces.
- Shape. Either by making a ball and poking a hole through and making it gradually larger with your hand or roll out a 10inch/8cm tube, wrap it around your hand so the ends overlap on your palm and roll the ends together on the bench to seal. Place them on a parchment lined tray, sprinkled with a bit of polenta or flour to help them stop sticking.
- Cover with a damp cloth and let rise for 30-45 minutes. You will know they are ready to cook when you press a finger print in and it disappears after a few seconds.
- Preheat your oven to 200c/395f. Set up a tray with a rack near the stove so you can transfer wet bagels onto it to dry.
- Bring a pot of water to a simmer. Place your bagel in for about 60seconds. I find the best rise is given by gently simmering one side for 45 seconds and then quickly turning it over and simmering for another 15 seconds or so.
- Place you bagels on to your rack to drip off any excess water.
- Brush your bagels with egg white. This is where you can add any sprinkles. I like salt bagels, but sesame seeds, poppy seeds or other toppings are available.
- Bake for 20 minutes or so until golden brown.

Buy Sourdough courses and supplies here -