
Goat's Milk Soap Recipe
One of our favourite uses for our goat’s milk, other than cheese, is to make goat’s milk soap. Great for people with dry skin, this soap is easy to make and makes a wonderful gift. It is just as easy to make with shop bought goat’s milk, so no need to buy a goat (though you may want to!!)
If you’ve never worked with lye before, in can be scary and we always suggest to use gloves, a face mask and protective eyewear. Also, always have some distilled white vinegar handy in case of spills. However, while lye is a dangerous chemical, it really isn’t that hard to work with once you get the hang of it.
SAFETY TIPS
Never use aluminium around lye - it causes a chemical reaction and can explode. Make sure you are using enamel, stainless steel, glass or plastic bowls and utensils.
Make sure you have the right safety equipment - rubber gloves, a face mask, goggles and an apron should all be worn. In addition, you should have some white vinegar handy to neutralise any spills.
Always add lye to liquid, never the other way around. You don’t want any unnecessary splashes and this is a way to minimise it.
Use a recipe that has been tested, or if you are going change the ingredients at all, run it through a lye calculator. This is to ensure all of the lye is neutralised in the saponification stage.
OK, Safety covered, lets get onto making some soap.
SOAP MAKING EQUIPMENT
In addition to the safety equipment mentioned above, you will also need:
A large bucket or bowl
A wand mixer
A metal spoon
Scales
Parchment/wax paper
A box or another container for using as a soap mould
The only difference between this soap and a basic cold process is that the milk is frozen to start with. You want your milk to remain as uncooked as possible and freezing it gives it more of a chance to stay as close to raw as possible when the lye hits it.
This is a really nourishing soap - shea butter and milk are great for dye skin.
Ingredients
340g coconut oil
425g olive oil
370g unrefined shea butter
375g goat milk (or other milk) frozen
155g sodium hydroxide (lye)
29g essential oils, optional
Method
Note: Make sure that your work area is clean, ventilated and that there are no children nearby. This is not a good recipe to let children help with since Lye is caustic until mixed with water and oils. It is best to have all your ingredients and materials ready before you begin, so you can just mix everything quickly and easily.
The night before, freeze your milk. This stops the fats from burning. I freeze it in the bowl I will be working in.
On the day of soap making, start by melting your coconut oil and shea butter. You can do this in the microwave or in a pan.
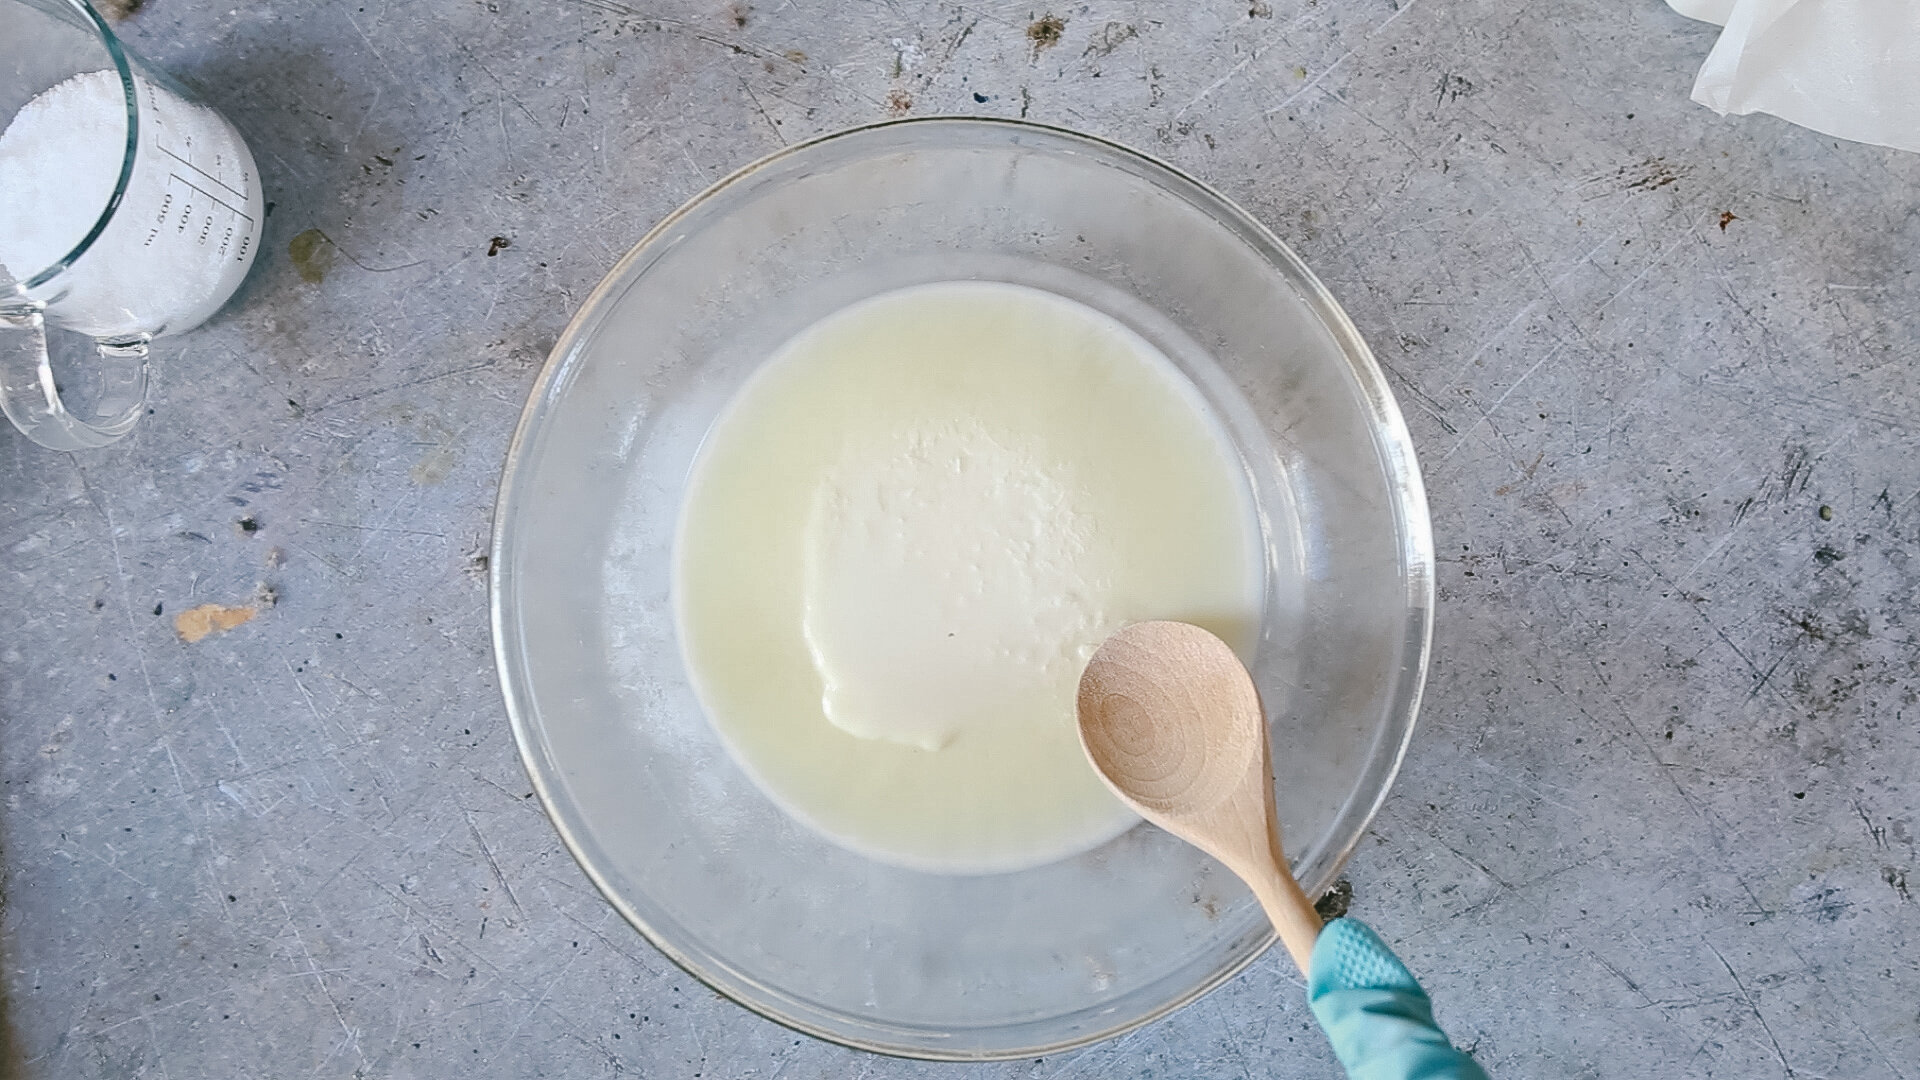
With gloves and eye protection, slowly add the lye to the frozen milk. NEVER ADD THE WATER TO THE LYE (this is really important). Stir carefully with a spoon, making sure not to let the liquid come in contact with your body directly.

As you stir, this will create a cloudy white mixture that might get warm. Let this mixture set for about 10 minutes to cool.
When you have your melted coconut oil, pour it into a bowl and add the olive oil.
Slowly pour in the milk and lye mixture and stir.
Quickly rinse the container used for the water and lye mixture out in the sink. I rinse well and then re-rinse with white vinegar to make sure all Lye has been neutralised.
Use the metal or wooden spoon to stir the lye/water mixture into the oil mixture in.
Once it is evenly mixed, use the immersion blender to blend for about 4-5 minutes or until it is opaque and starting to thicken.

If you are going to use essential oils for scent, add them now.
Quickly and carefully spoon into molds. Any container will work, but I like loaf tins lined with parchment paper. I have included instructions for making one out of a box lined with parchment paper.
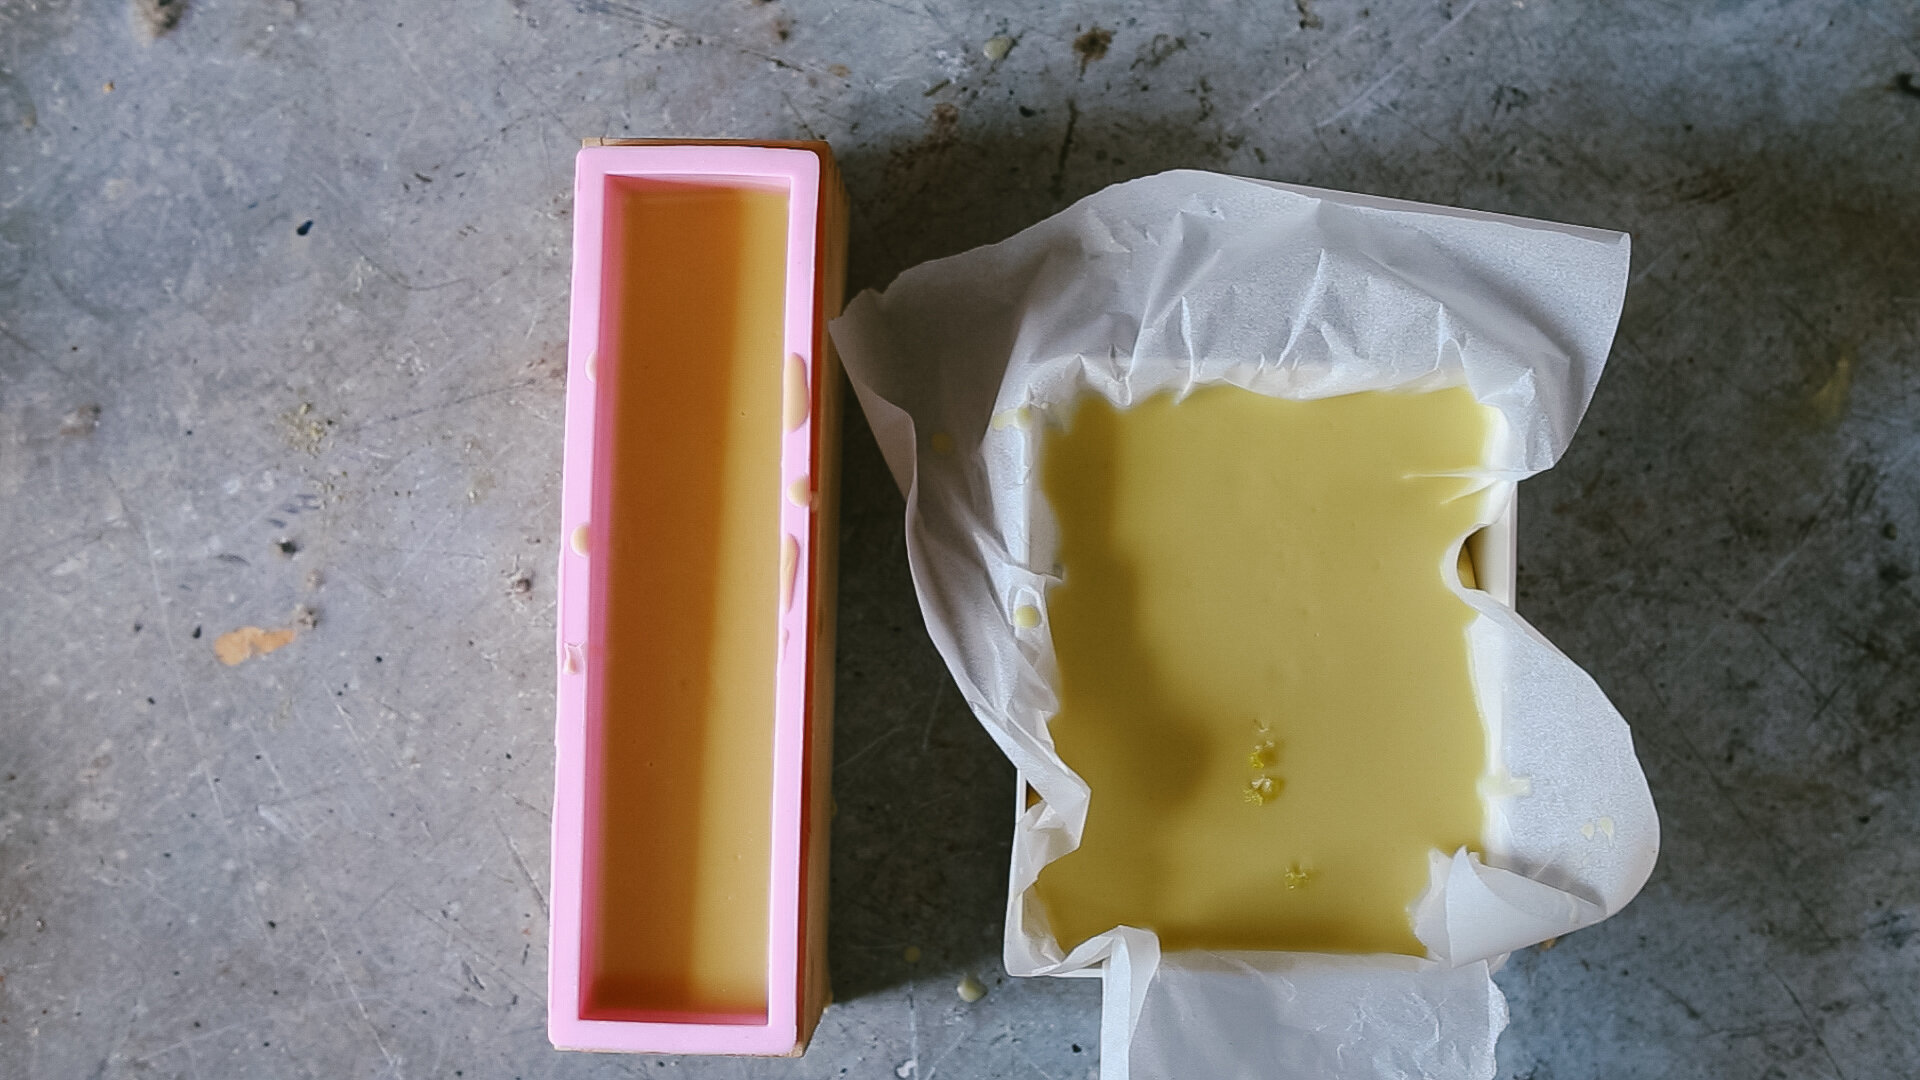
Cover the molds with parchment paper and set in a cool, dry place, away from kids and pets.
After 24 hours, using gloves remove the soap from the moulds and cut into bars.
Leave the bars somewhere to cure for about 4 weeks. You can test if they are done by sticking your tounge on them (yes this is really what you do) to see if the lye is still active. It will zing you like a battery if they aren’t ready.
Want to Dig Deeper?
Botanical Soap Making
This course is 8 weeks of lessons of written and video content. We will take you through the basic soap making and herbal processing techniques and then look at how to apply that in your soap making through a series of deep dives into common herbs, oils and materials used for soap making, including: calendula, nettles, bog myrtle, horsetail, lavender, yarrow and honey. We will also cover how to get a license for selling soap and guidelines on packaging and labelling so you can meet UK regulations.
-
Soap Making Basics, Safety and Equipment
Basic Soap Making Techniques: cold and hot process
Advanced Soap Making Techniques: castille soap and goat’s milk soap
Working with botanical ingredients (each herbal focus includes harvesting tips, processing guidelines, a printable herbal monograph and a soap recipe specific for that ingredient). We will cover:
Calendula
Nettles
Bog Myrtle
Horsetail
Lavender
Yarrow
Working with honey and beeswax
Using Soap Additives and Colours
Getting a license for selling your soap
-
This course is hosted on Mighty Networks - a comprehensive platform that allows us to host the community, live sessions and online courses all in one space.
Once your purchase is completed, you will receive an email with the details you need to join the network, or add this course to your profile if you are already a member.
The course is available to work through at any time.

Goat's Milk Soap

Ingredients
- 340g coconut oil
- 425g olive oil
- 370g unrefined shea butter
- 375g goat milk (or other milk) frozen
- 155g sodium hydroxide (lye)
- 29g essential oils, optional
- Never use aluminium around lye - it causes a chemical reaction and can explode. Make sure you are using enamel, stainless steel, glass or plastic bowls and utensils.
- Make sure you have the right safety equipment - rubber gloves, a face mask, goggles and an apron should all be worn. In addition, you should have some white vinegar handy to neutralise any spills.
- Always add lye to liquid, never the other way around. You don’t want any unnecessary splashes and this is a way to minimise it.
- Use a recipe that has been tested, or if you are going change the ingredients at all, run it through a lye calculator. This is to ensure all of the lye is neutralised in the saponification stage.
- A large bucket or bowl
- A wand mixer
- A metal spoon
- Scales
- Parchment/wax paper
- A box or another container for using as a soap mould
Method
- The night before, freeze your milk. This stops the fats from burning. I freeze it in the bowl I will be working in.
- On the day of soap making, start by melting your coconut oil and shea butter. You can do this in the microwave or in a pan.
- With gloves and eye protection, slowly add the lye to the frozen milk. NEVER ADD THE WATER TO THE LYE (this is really important). Stir carefully with a spoon, making sure not to let the liquid come in contact with your body directly.
- As you stir, this will create a cloudy white mixture that might get warm. Let this mixture set for about 10 minutes to cool.
- When you have your melted coconut oil, pour it into a bowl and add the olive oil.
- Slowly pour in the milk and lye mixture and stir.
- Quickly rinse the container used for the water and lye mixture out in the sink. I rinse well and then re-rinse with white vinegar to make sure all Lye has been neutralised.
- Use the metal or wooden spoon to stir the lye/water mixture into the oil mixture in.
- Once it is evenly mixed, use the immersion blender to blend for about 4-5 minutes or until it is opaque and starting to thicken.
- If you are going to use essential oils for scent, add them now.
- Quickly and carefully spoon into molds. Any container will work, but I like loaf tins lined with parchment paper. I have included instructions for making one out of a box lined with parchment paper.
- Cover the molds with parchment paper and set in a cool, dry place, away from kids and pets.
- After 24 hours, using gloves remove the soap from the moulds and cut into bars.
- Leave the bars somewhere to cure for about 4 weeks. You can test if they are done by sticking your tounge on them (yes this is really what you do) to see if the lye is still active. It will zing you like a battery if they aren’t ready.

We have two online courses with more soap recipes available -