Today Joanne lectures tells us all about how to block your work!
It seems utterly incredible to me now that once upon a time I had never heard of blocking. Not heard of it. Not at all. Now, I could not consider a piece finished until it has been blocked. What a difference it makes to how I feel about my finished objects! (FOs) No longer am I slightly disappointed with how they turn out. Now they have the beautiful smooth, even appearance I hoped for. Perhaps you are the same and you haven't yet heard about the wonder of blocking? Perhaps you have heard about it but aren't quite sure how or why you would do it? Here is my quick tutorial:
HOW TO WET BLOCK
So this is a lace crochet shawlette, using a merino lace weight yarn but the principles are fairly similar knit or crochet and for yarns with a high wool content (I will discuss other fibres at the end) and apply to anything flat. (I'll talk about 3D blocking a little at the end):
This is a before shot. Looks quite nice but it is a bit scrunched up and nowhere near big enough.
For comparison here are the pre-blocking measurements.
Here are the tools I used:
- Blocking mats (these are actually kids play mats, the foamy plastic kind you can buy pretty cheaply. You can buy real blocking mats or interlocking gym floor tiles or pin it directly onto a mattress (although the plastic is good because it will dry quicker)
- A no rinse soak - I like Euclan but there are lots of brands available (but I doubt you can beat the smell of Euclan Wrapture - scrummy!!) This is optional, if you don't have it you can just use water.
- A tape measure (to help you ascertain how big you should pull the FO out to)
- Blocking pins (these are also called T head pins and are commonly available, most haberdashers, yarn shops and fabric shops will stock them - you can use any non rusting pin)
- Blocking wires (not strictly necessary but very useful and speed up the process no end) This is the set I have.
- A clean towel.
Here is what you need to do:
1) Soak the FO in a bowl of tepid water with a little of the soak added. You can just use plain water but the soak cleans, removes any traces of oil (from the spinning), makes it smell great and may deter moths (most of the wool soak smell are designed to do this.)
2) After 15 minutes, remove the FO from the water and gently squeeze some of the water out. Gently roll it in a clean towel to remove the rest of the water. Gently is the key word here. You do not want to felt your FO. Any rough handling at this stage runs the risk of felting.
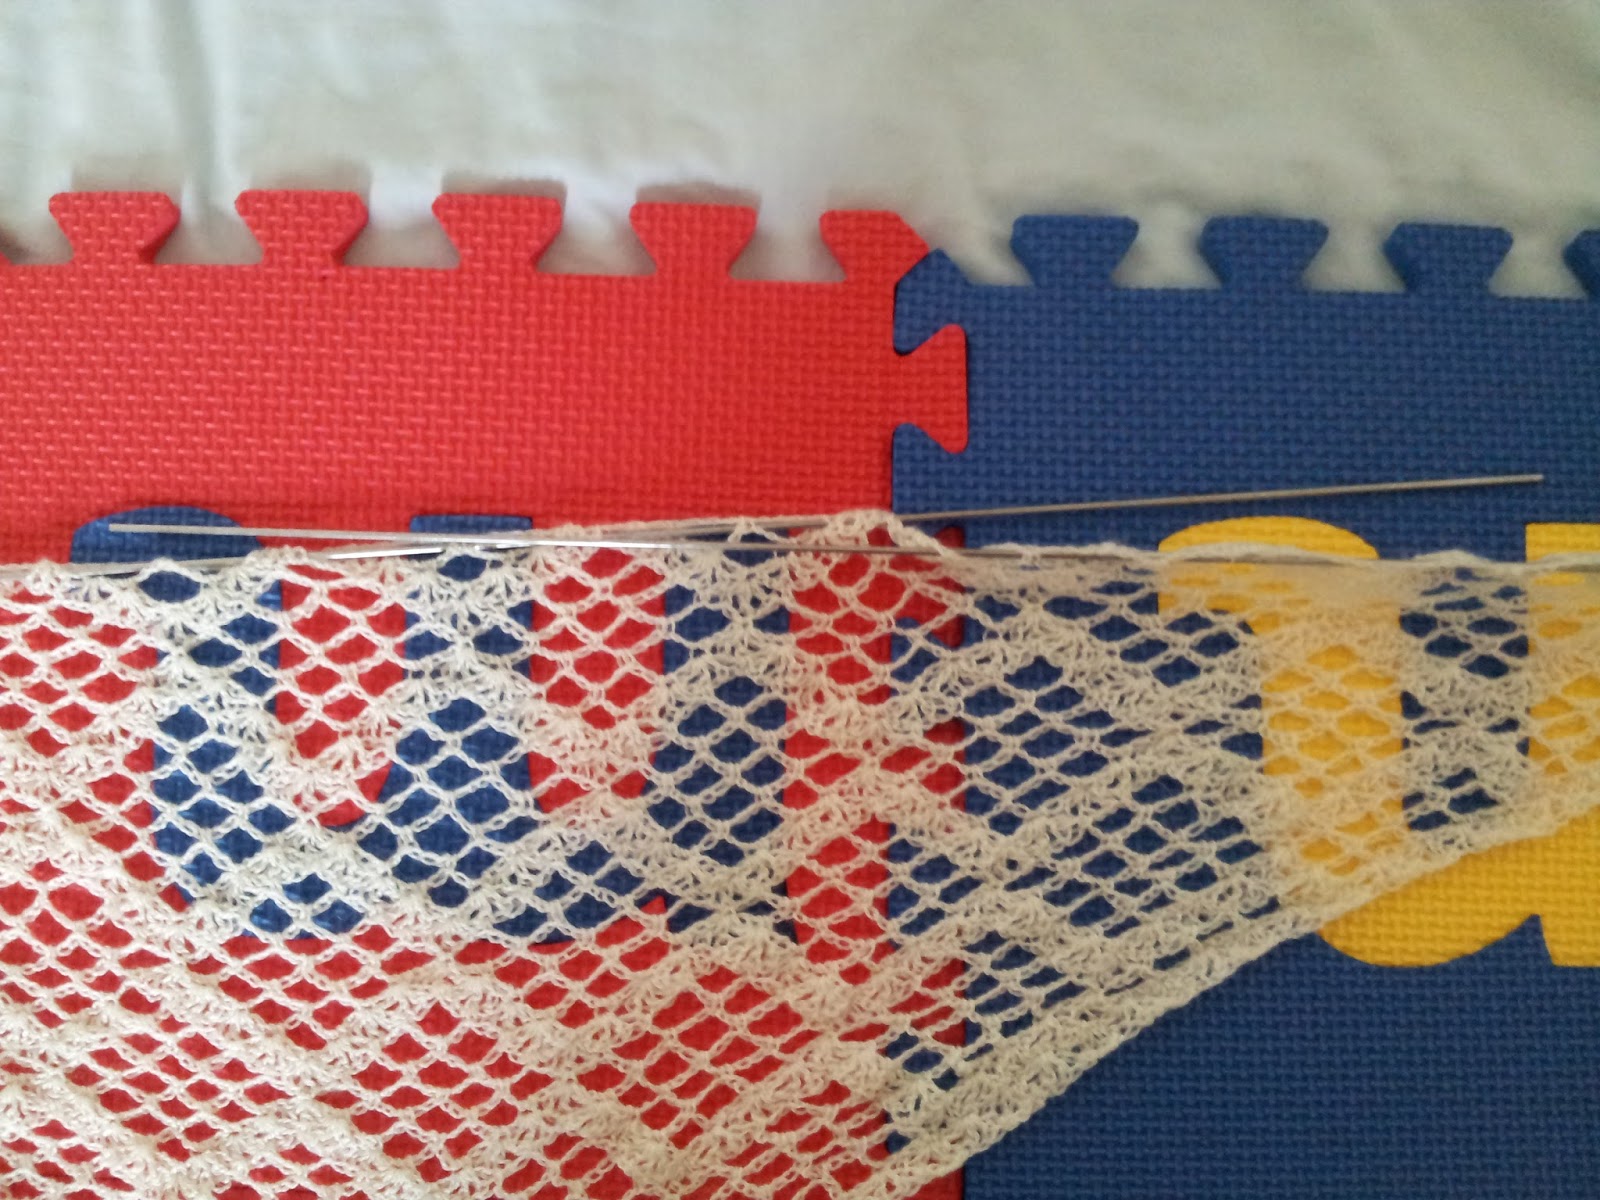
3) Begin threading the blocking wires through the edge of the piece, making sure that if there is a pattern you hit the same point of the pattern each time.
Where the wires are too short for the whole width you will need to use two, make sure there is plenty of crossover as you don't want it to fall off the middle when you stretch it out.
Continue until all the edges have been threaded onto the wires.
5) Using your tape measure gently stretch the wires apart until the piece has the desired dimensions (you can get these from the schematic or pattern instructions) or if you don't have the dimensions to hand you can pull it until the pattern is pleasingly open or as large as you want it. Look at how much bigger the shawl is now and how open and regular the pattern looks. Much more pleasing!
If you don't have blocking wires then you will need to pin the corners to the size you want then pin evenly along each side. If the piece has curves or unusual shapes that need blocking then you will need to pin them as the wires work best for straight edges (although they do have enough flex in them to pin them into a shallow curve)
6) Allow to dry thoroughly and then wear with pride (or seam it up if it is a pesky flat knit sweater) The piece will now hold its shape until it gets wet (or damp) again.
BLOCKING FAQS
Q Do I need to block it everytime I wash it?
A Yes, sorry, you do really. Laying it out flat will work okay but blocking really makes a pieces zing. If you use wires it isn't too traumatic.
Q I really want to wear it NOW! Is there a quicker way?
A Yes, as every designer who has been pressed for a deadline will tell you, there are a couple of quicker options. You can pin it out to the correct size while dry and then:
- Spritz it with water from a spray bottle and let it dry - this is much quicker than soaking because it doesn't get as wet. OR
- Hold a steam iron over it - this is super quick because it only really has to cool down but be really really careful not to get the iron too close or the steam too hot. You should always test it out on your swatch first to check the fabric doesn't get ruined. You did make a swatch, right? *stern glare*
Q Can I block fibres other than wool?
A Yes, almost all knitting and crochet looks better after blocking. With fibres other than wool you may not be able to get the blocking to stay fixed. That is you may not be able to use blocking to pull it out to a different size. For more delicate yarns then pinning the piece out dry then spritzing is probably the way to go to avoid damaging them while wet (cotton, alpaca and silk I am looking at you!) You should know all this by the time you start the knit anyway because you have blocked your swatch. Right?
Q What is aggressive blocking?
A Soak and pin it out as described. Leave it for an hour then stretch it out some more. Leave it to dry. This helps you get the maximum stretch out and helps certain lace patterns really show well.
Q I am making a project in flat pieces. When is the best time to block it?
A Before you seam the pieces together is best. Blocking before seaming makes the seaming process so much easier and it is easier to block flat pieces. Don't worry you won't have to unseam it each time you wash it! See below.
Q I want to block but it isn't a flat piece. How do I do this?
A You will need to dry it over something that is the right shape ideally.
- Balloons inflated to the right size are perfect for blocking hats.
- Blocking a beret or tam shaped hat over a plate really helps shape it.
- A sweater can be pulled flat and blocked to shape on blocking mats but I really like, for sweaters and cardigans that I make in the round to block it on a tailors dummy set to the right size (for the actual finished garment not for the intended fit)
- Socks, I use special sock blockers like these.
Happy Blocking!