
Bonus Week: Cables Taster
Now you have the hang of knitting and purling there are so many exciting places that can take you! Yesterday Libby introduced you to colourwork and today Joanne will introduce you to the joy of cables.
What are cables ?
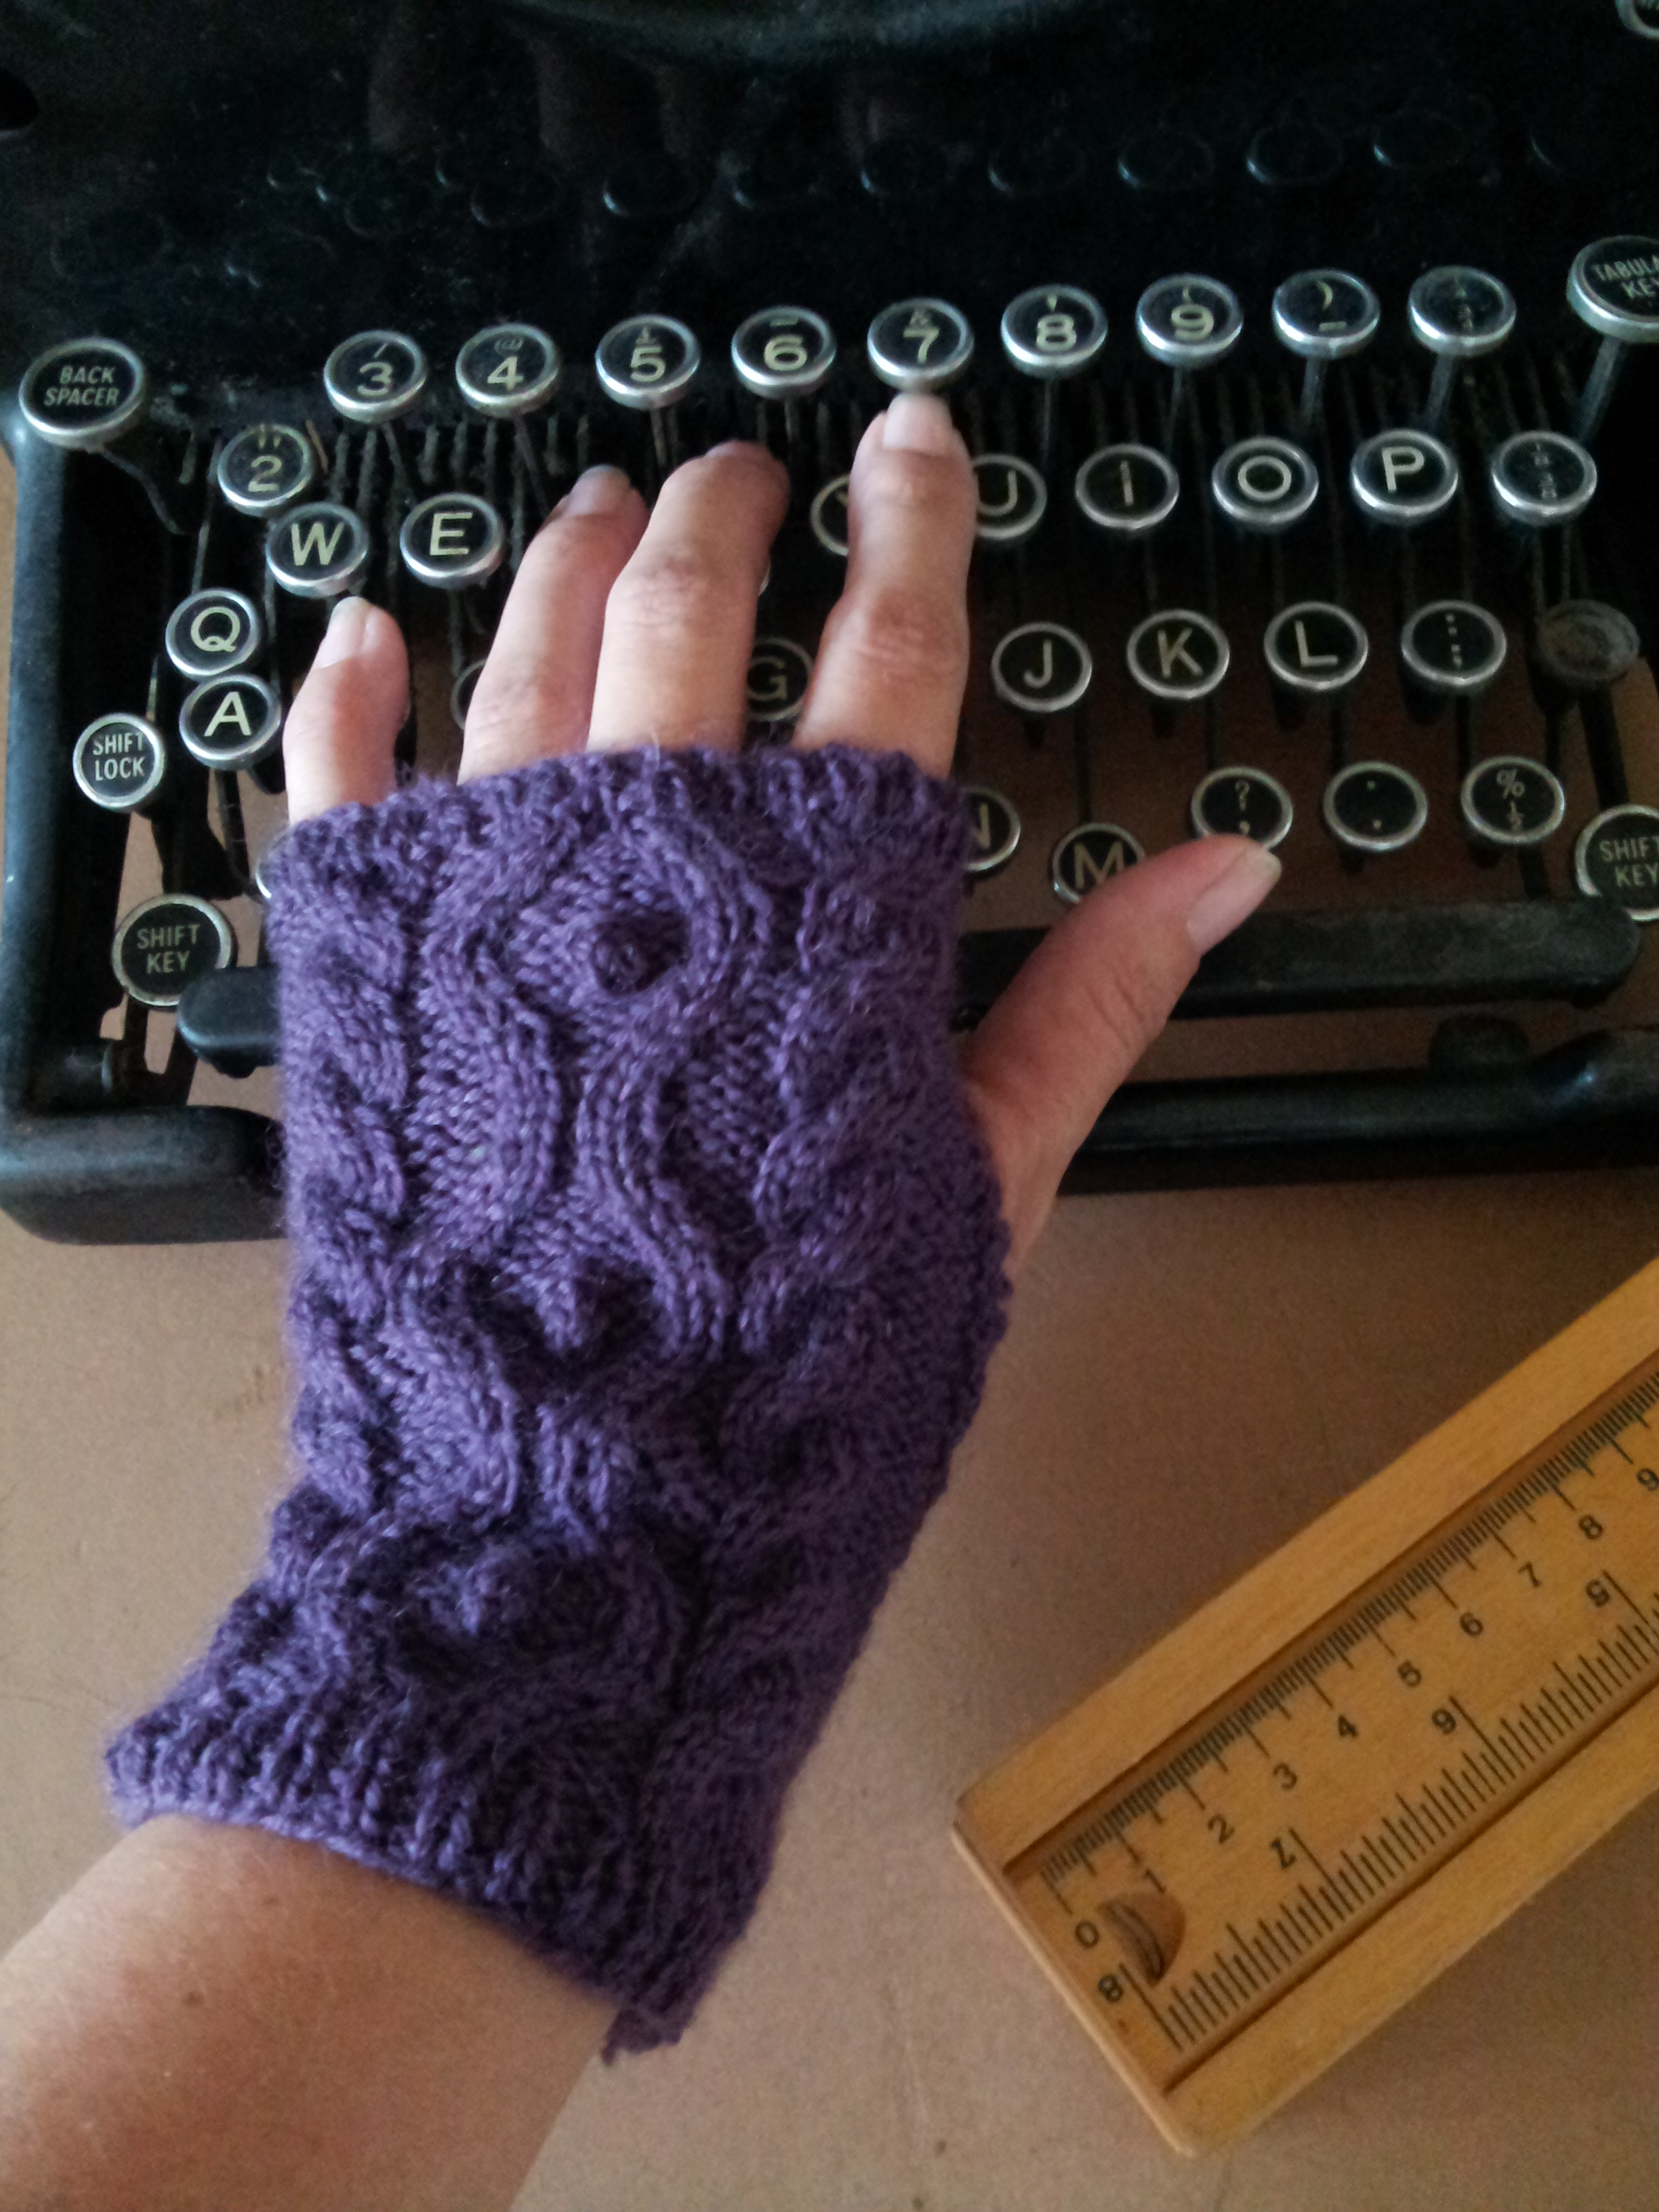
Cables are created by moving the order of stitches as they occur in a row for decorative effect. They are normally formed by working patterns of stocking stitch (Knit on RS, Purl on WS) on a background of reverse stocking stitch (Purl on RS, Knit on WS) or moss stitch (k1,p1). Cables are normally worked on the right side of the knitting only.
To move the stitches we use a cable needle. It can be a fancy curved one like this or just a normal double pointed needle.
Insert the cable needle into the stitch as if you were going to purl then slip it over to the cable needle without working the stitch. Do this for as many stitches as neccesary. In this example we will slip three over to the cable needle.
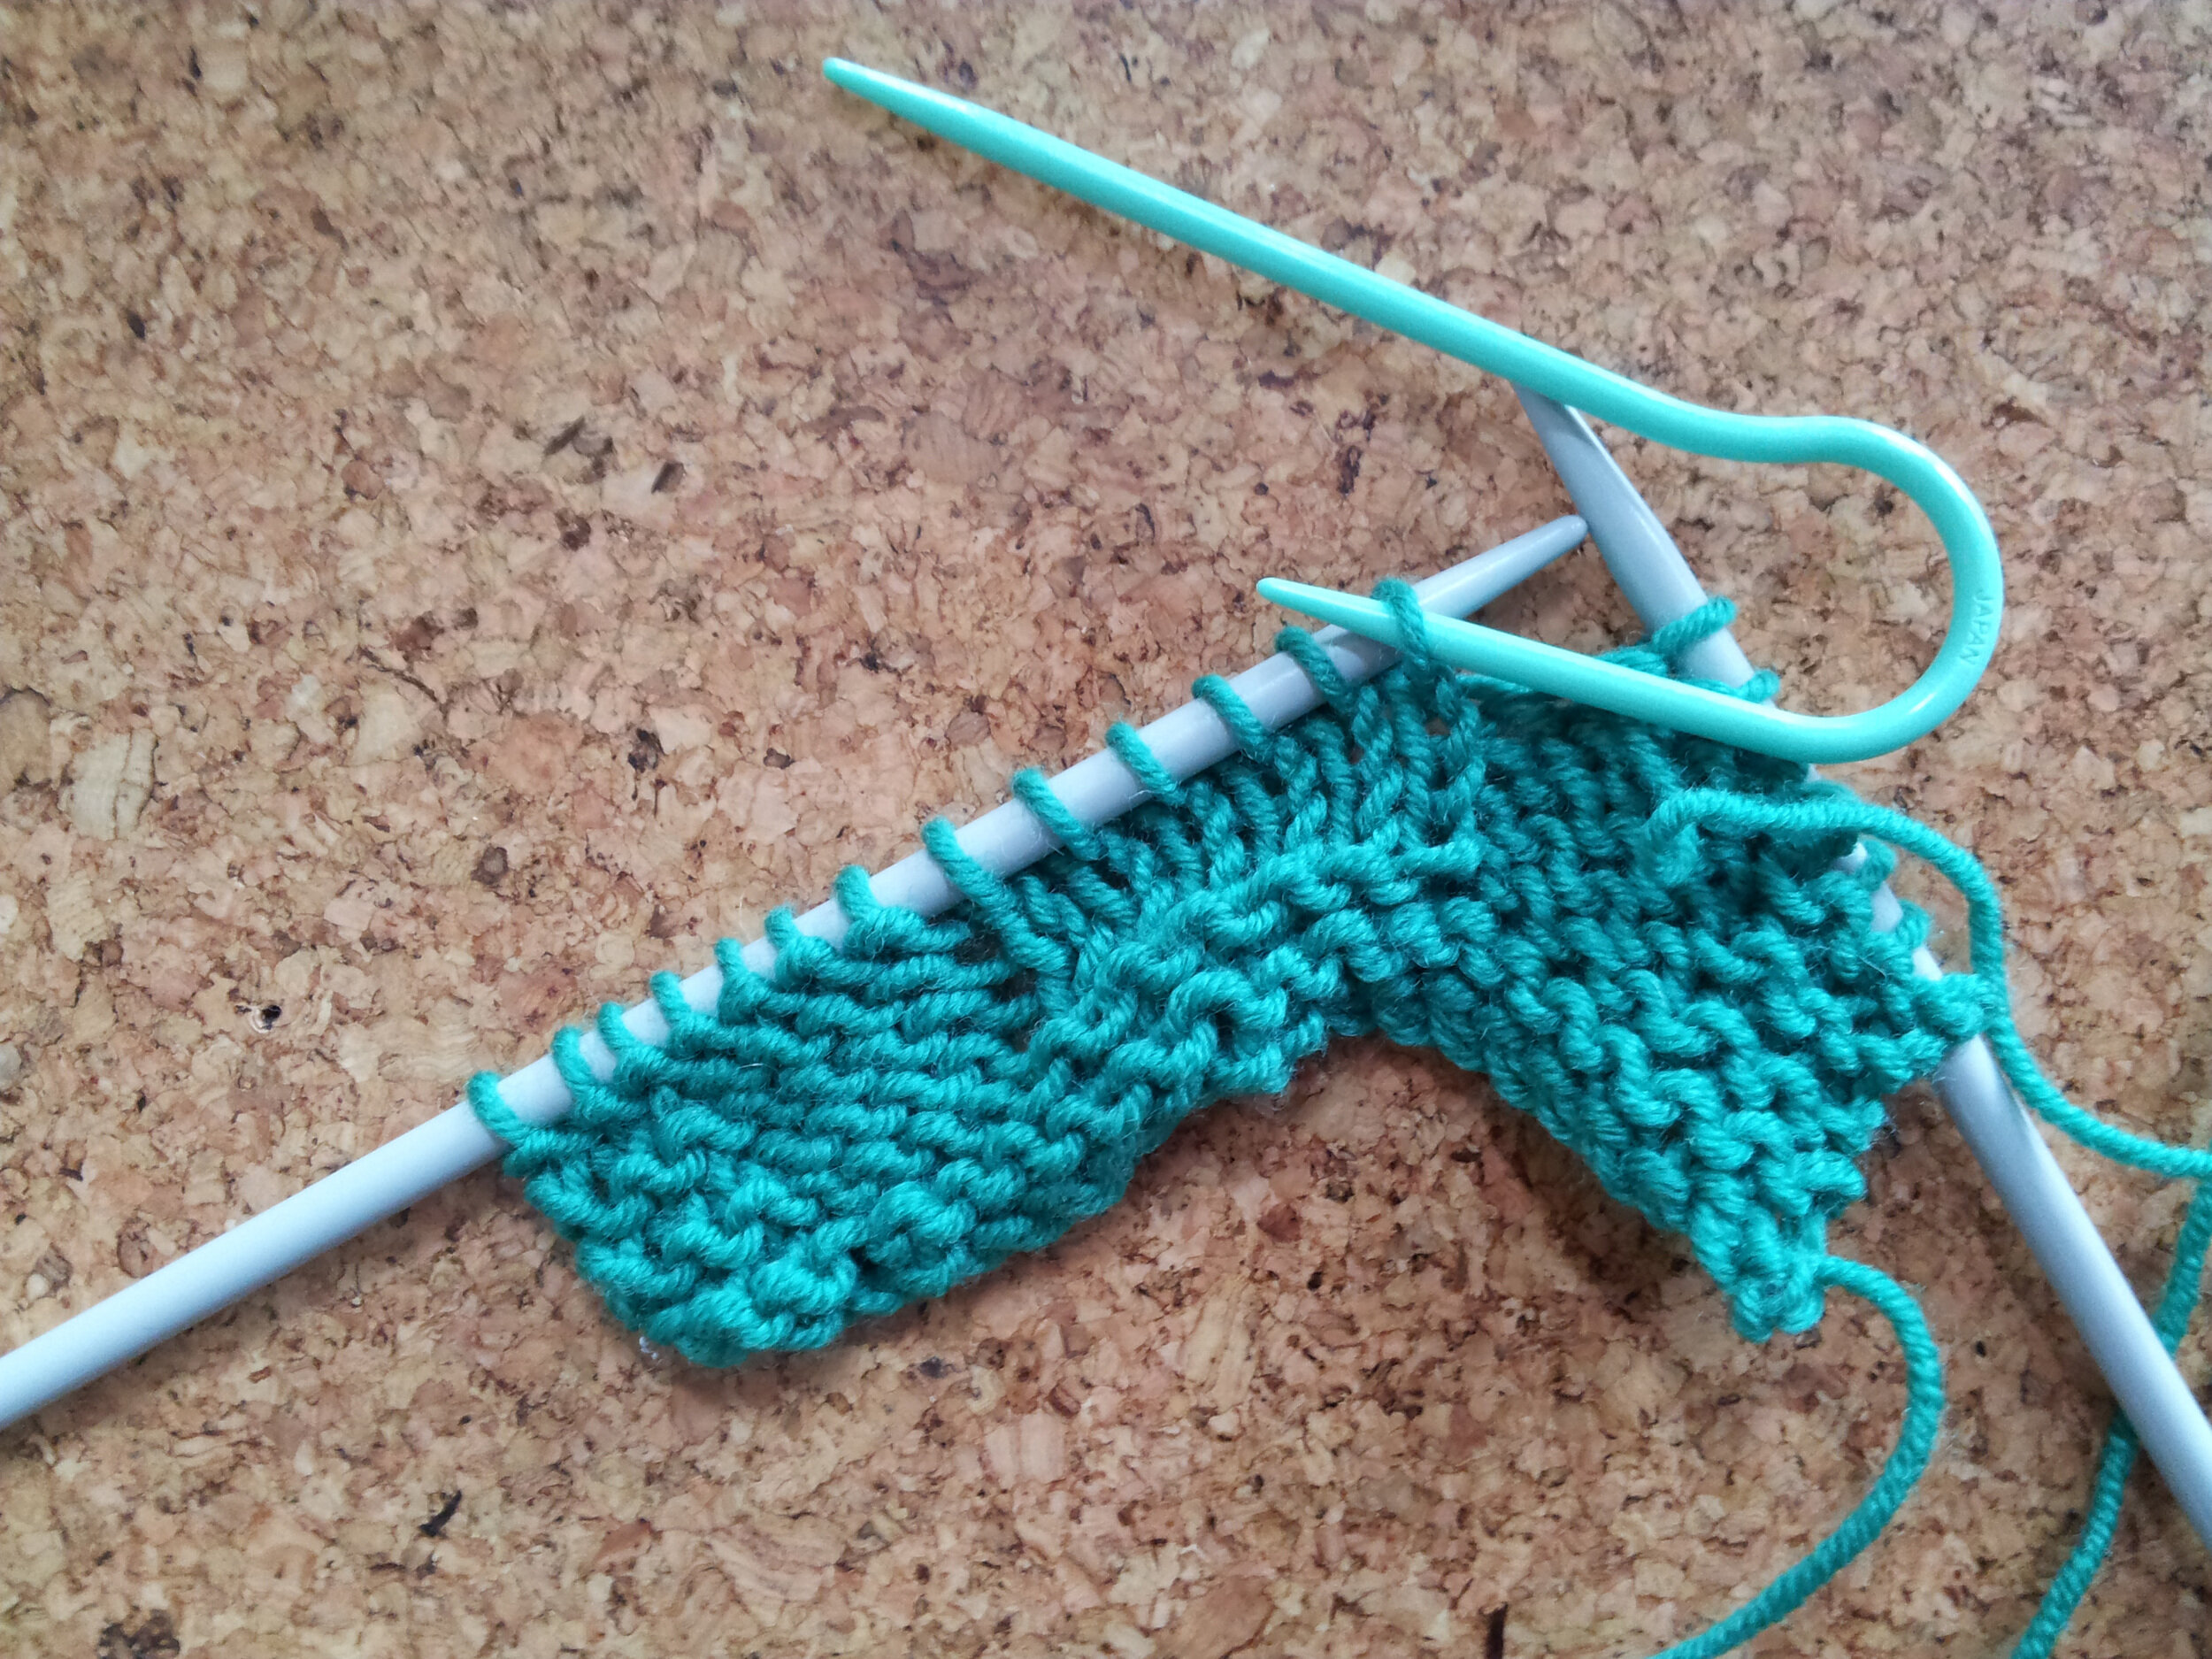
Hold the cable needle at the back

or front of the work depending on the instruction. In this example we are holding it at the front to make a left cross.
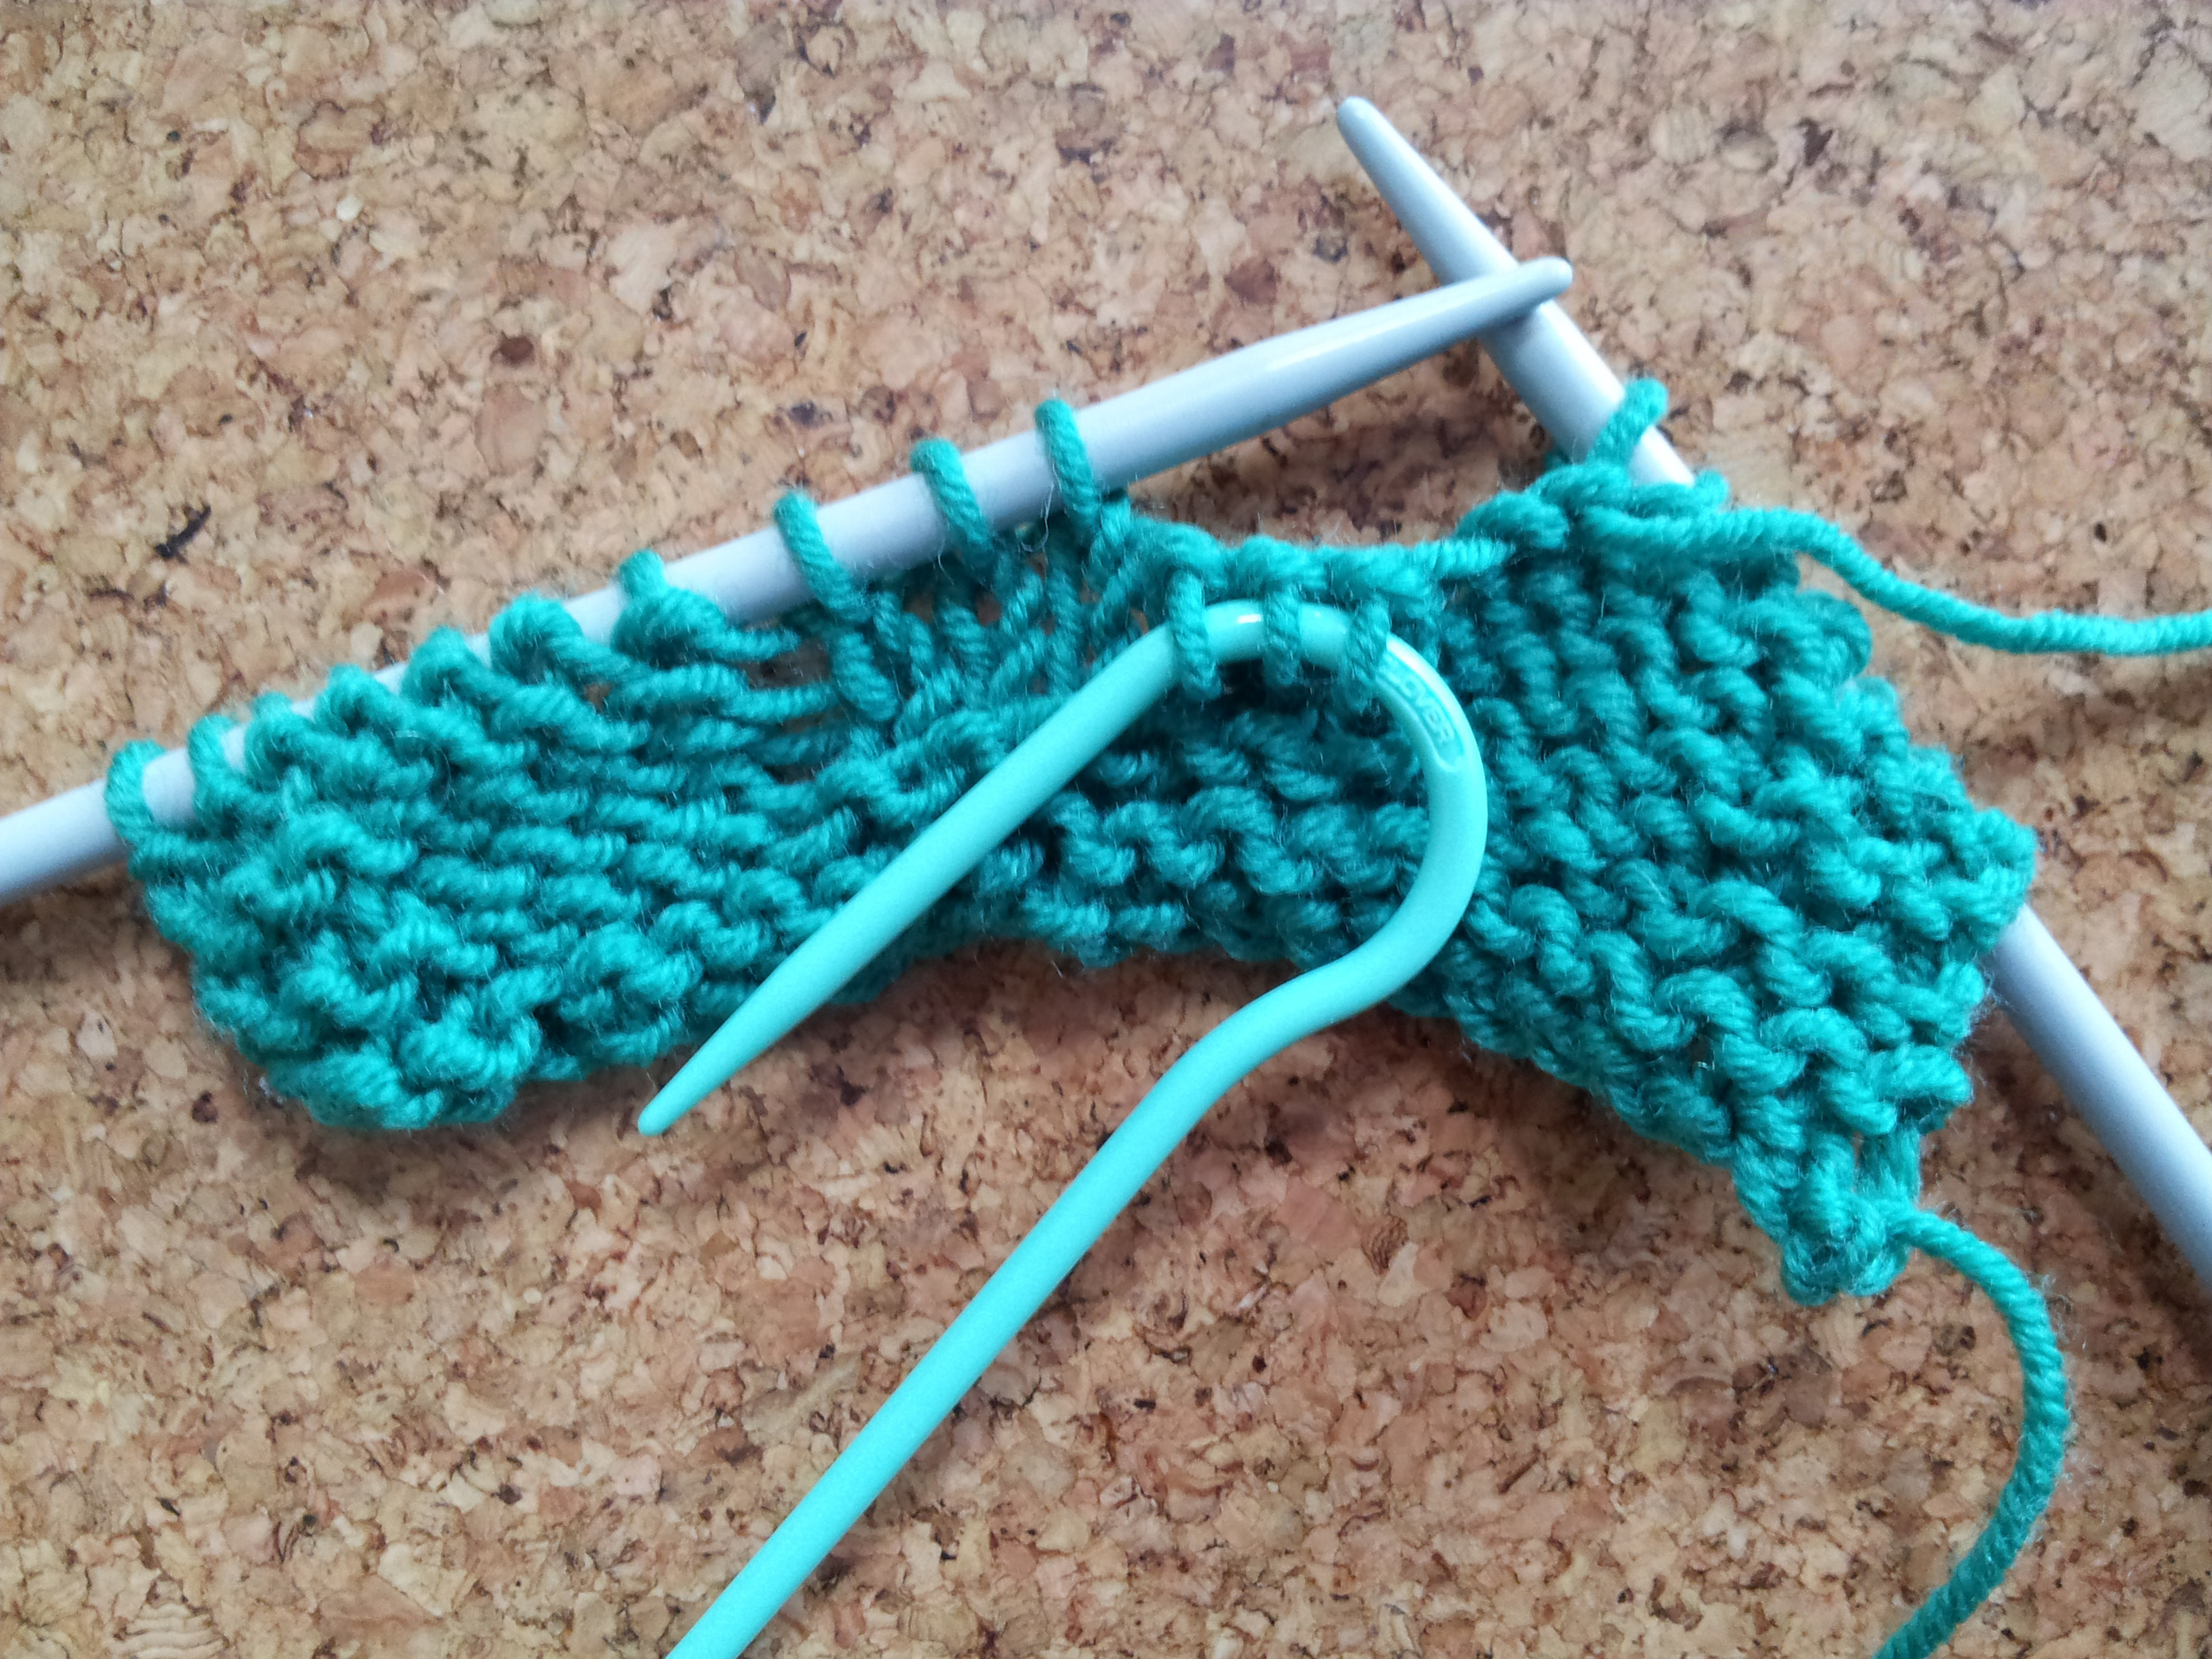
Work the correct number of stitches from the left hand knitting needle.

Then work the stitches from the cable needle
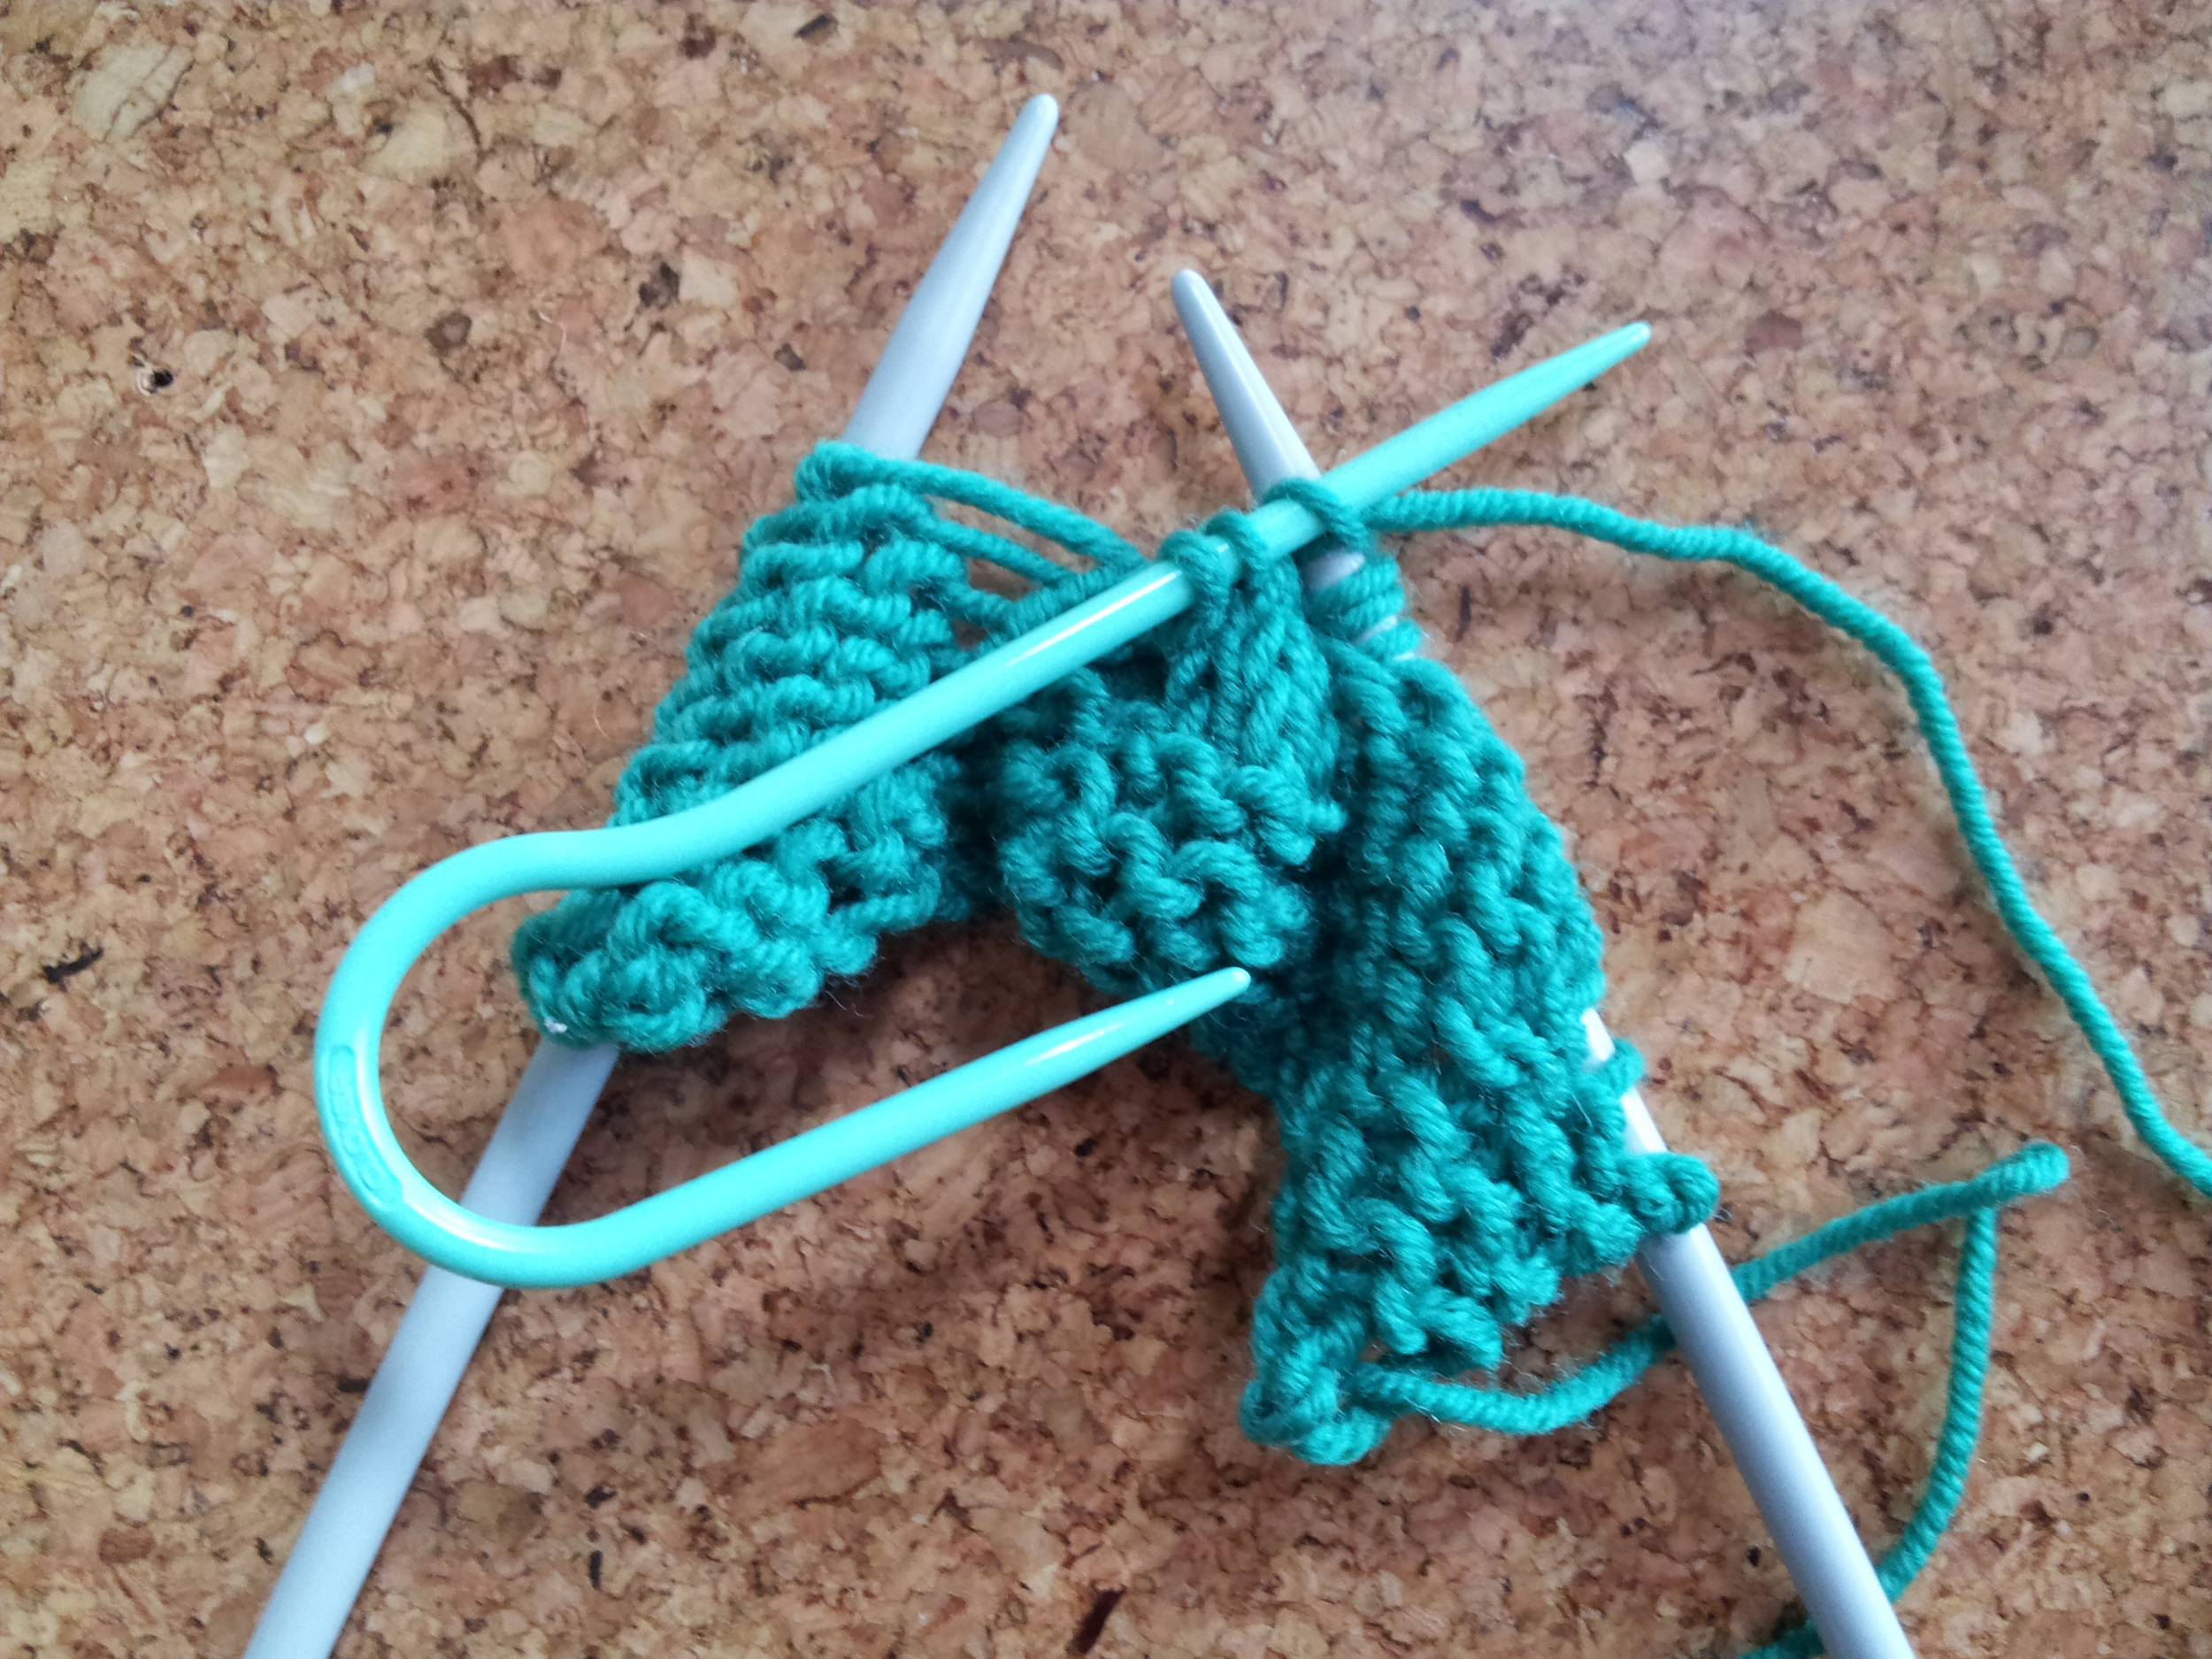
Continue knitting from the pattern

How are cables written in a pattern? Always check the description in the pattern section “special stitches” because variations in terminology do happen. The standard abbreviations work like this: C6F C denotes cable. The number denotes the total number of stitches in the procedure. The final letter tells you where to hold the stitches on the needle F is Front of work, B is back of work. So in these examples: C6F, slip 3 stitches to the cable needle and hold it at the front of the work, knit the next 3 stitches then knit the stitches on the cable needle. There is also a more descriptive convention for naming that is becoming more common (as the most popular charting software supports it) 3/3LC The numbers denote how many stitches are to be worked split by how many are travelling over how many. L or R designates the direction that the stitch is travelling in (for left hold at front, for right hold at back (I use the mnemonic RIGHT=REAR))
So those who have been paying attention will realise that 3/3LC means the same as C6F we used in our last example. And also that this is the very stitch used in the photo tutorial. Clever you for keeping up!
How do I cast on and off for cables? There are no special requirements for cables so you can use your favourite method or the method specified in the pattern. I like a knitted or cabled cast on because they give a smooth attractive cast on with minimal curling on rib.
Top tips for getting cables right
- Cables distort the surface of the knitting. They contract the fabric meaning that the cabled section will not be as wide as a stocking stitch section. They are also not as elastic as stocking stitch.
- Anytime you move from a knit stitch to a purl stitch there is a possibility of a ladder because of the way the yarn is moved to make the purl stitch, this is exaggerated when working a cable so be sure to pull the yarn tightly when moving between the two.
- Cables look much more even and ‘pop’ after blocking. Blocking uses water or steam to smooth, stretch and shape the finished piece.
- It can be helpful to place a marker at the start of each pattern repeat to help you keep track of where you are and to assist counting and correcting an error.
- Lifelines are particularly useful for cables, lace and any stitch patterns where the stitches are increased, decreased, slipped or rearranged as these are very hard to rip back to accurately. We will cover lifelines on Thursday.