4KCBWDAY2: Inspiration and Design
Today's 4KCBWDAY2 challenge is to design the house mascot, but truth be told, my head is simply too full of another design to work on something new. So, as the point is to " blog about the journey which inspiration and investigating patterns, yarns, stitches, (etc) can often guide you through", I thought that rather than an abstract design I might make one day, I would walk you through the process for my most recently published design: Aruacaria Cardigan from The Crochet Project (it is a botanical themed collection and bees are integral to botanics...its all related, see? ;) )

In almost every design, I start with the photo I want to take of the design forefront in my mind. How will it look? What angles will I photograph the details from? What colour and shape will I use? Not to say that things don't change as I go, but I am definitely a product person in the "process versus product" design discussion.
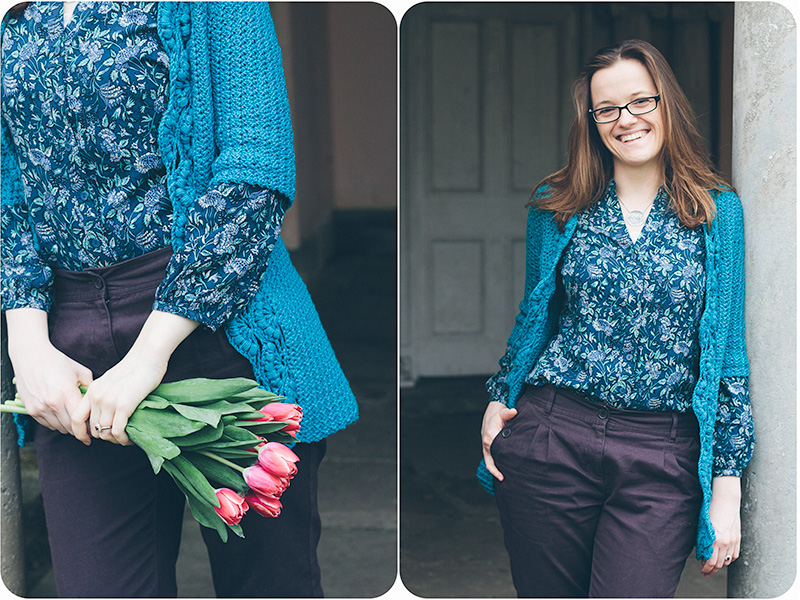
I knew I wanted a teal green for the cardigan, to add some darker colours to the palette for the rest of the designs. The yarn is Sublime Cashmere, Silk Merino DK. I just found out the other day it is being discontinued *sob* but the baby version will continue *yay!*. I really love this yarn - it has great stitch definition, drape and twist to make really lovely wearable garments that you want to put on and feel special in. It isn't cheap, but from experience the silk and twist of this yarn help it wear really well, and I think that is crucial when making a garment...as it takes so much time to make, it is worth it to ensure it will last.
The original design had a cabled collar on the edge. However, to achieve the feminine shaping we were aiming for, a flowing cabled shawl collar proved difficult to get right. After many failed swatching attempts (and even dreams about how the design might work), it was back to the drawing board...or rather the well-thumbed stitch dictionary.
I have written before about how important I find stitch dictionaries to my work. I simply could not live without them. However, it still often takes a ton of work to get from chart in a book to a workable stitch for a pattern - there are so many considerations - gauge, increases, round vs flat. I recently found a great stitch I was desperate to use for a cardigan, only to realise it really can only work in the round, and hard as I tried, steeking wasn't oing to work for a full cardi. But, all that aside, stitch dictionaries are invaluable.
In looking through, I found a pattern that I had actually earmarked for something else, but it looked so like a peacock, I simply couldn't let it go (the original name of the cardigan was Peacock in the Garden). It was doubly ideal, because it was worked from the edging out in rows. This meant I could work it all the way from bottom front edge, up around the neck and down to the other bottom front edge in one piece, which is really ideal for the drapey shawl collar I was after.
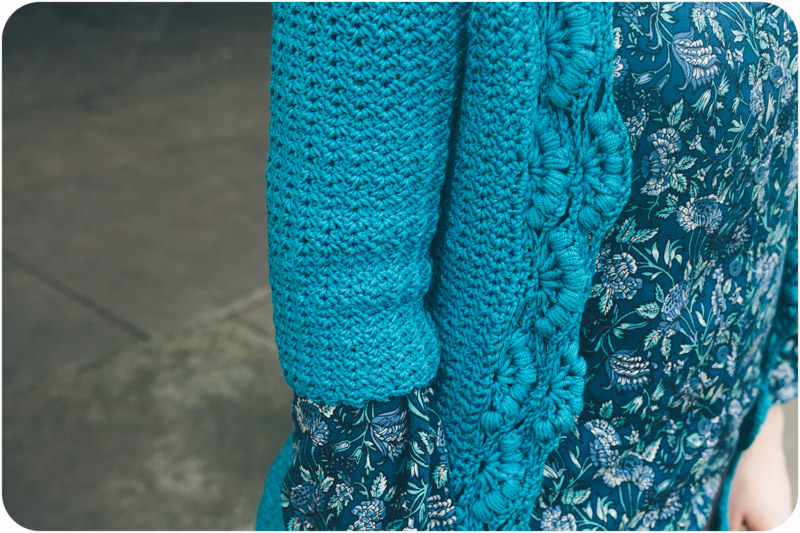
The construction of the sweater is a seamless, set-in shoulder, adapted from Barbara Walker (with help from Joanne Scrace). It starts at the neckline, with the back worked on one side of the foundation chain, then the front pieces worked on the other side of the chain, then joined at the underarm. While it doesn't work well for every garment, a seamless construction fits in well with the ethos of The Crochet Project - with its emphasis of lots of drape and flow. As the design uses short row shaping at the back and in the shoulders, I needed a main stitch that would hide the gaps and also have a right side that wasn't too different from the wrong side. I chose to use angled crochet, which works well to hide the gaps short rows can sometimes leave, and its back and front of the stitch are virtually indistinguishable.
Because I'd never made a seamless set in sleeved cardigan before, I actually wrote and graded the pattern as I made it - not really the best practice when designing (it usually involves less ripping if you plan it out first), but I simply couldn't picture how it would all come together. I only had a week from starting the cardigan to finishing the design for the photoshoot, so I really had to move on it and this approach, while intensive, did mean I was finished in 7.5 days!!
In the end, I have to say I am very pleased with the results. It is easily my favourite design to date, as I just love how it all came together, and it made the model VERY happy when she got to keep it as a thank you!!
(The pattern is available on Ravelry: buy now. You can also read more about and see the rest of the designs in The Crochet Project here)