
Week 3: Increasing
IncreasingWhat is increasing?
Increasing is the process of adding more stitches to your current row of stitches to either widen your work at the edges, at some point in the row, or create a three dimension shape for your fabric. Where and how you do the increase determines the effect on your fabric, so it is important to understand the different techniques and what they achieve.
How many different methods of increasing are there?
There are two key methods for the new knitter to learn for increasing the stitch count, without adding any other feature (such as a hole). This tutorial will teach these two basic methods, and leave the others for later.
What mistakes might I make while increasing?
The most common mistake is to accidentally add an extra stitch, perhaps by winding the yarn around the needle twice, or doing a yarn over by mistake (this will also create a hole!). When you are practising your increases, make sure you look carefully at the photos in the tutorial and match your efforts up with their appearance to check you are doing it right.
Increasing by knitting into the front and the back of stitch (kfb).
This is one of the easiest methods of increasing, and can be used for most patterns. At the place where you want to insert an extra stitch, knit a stitch in the usual way, but do not slip it off the needle, instead, insert your needle again into the back of the stitch, knit again and this time slip off the needle. Note that with this method, the extra stitch will appear after the stitch you have worked into, and will start off as a ‘purl’ loop in terms of appearance. once you have worked the next row, the new stitch will be incorporated into your stitch pattern. If you do not want a ‘purl’ stitch to appear, then work the other method (M1).
Because of its appearance, this method is most commonly used when increasing at the edge of your work, rather than when increasing at regular intervals across a row. For a symmetrical appearance when increasing at both ends, work into the first stitch of the row and the penultimate stitch, rather than the last stitch.
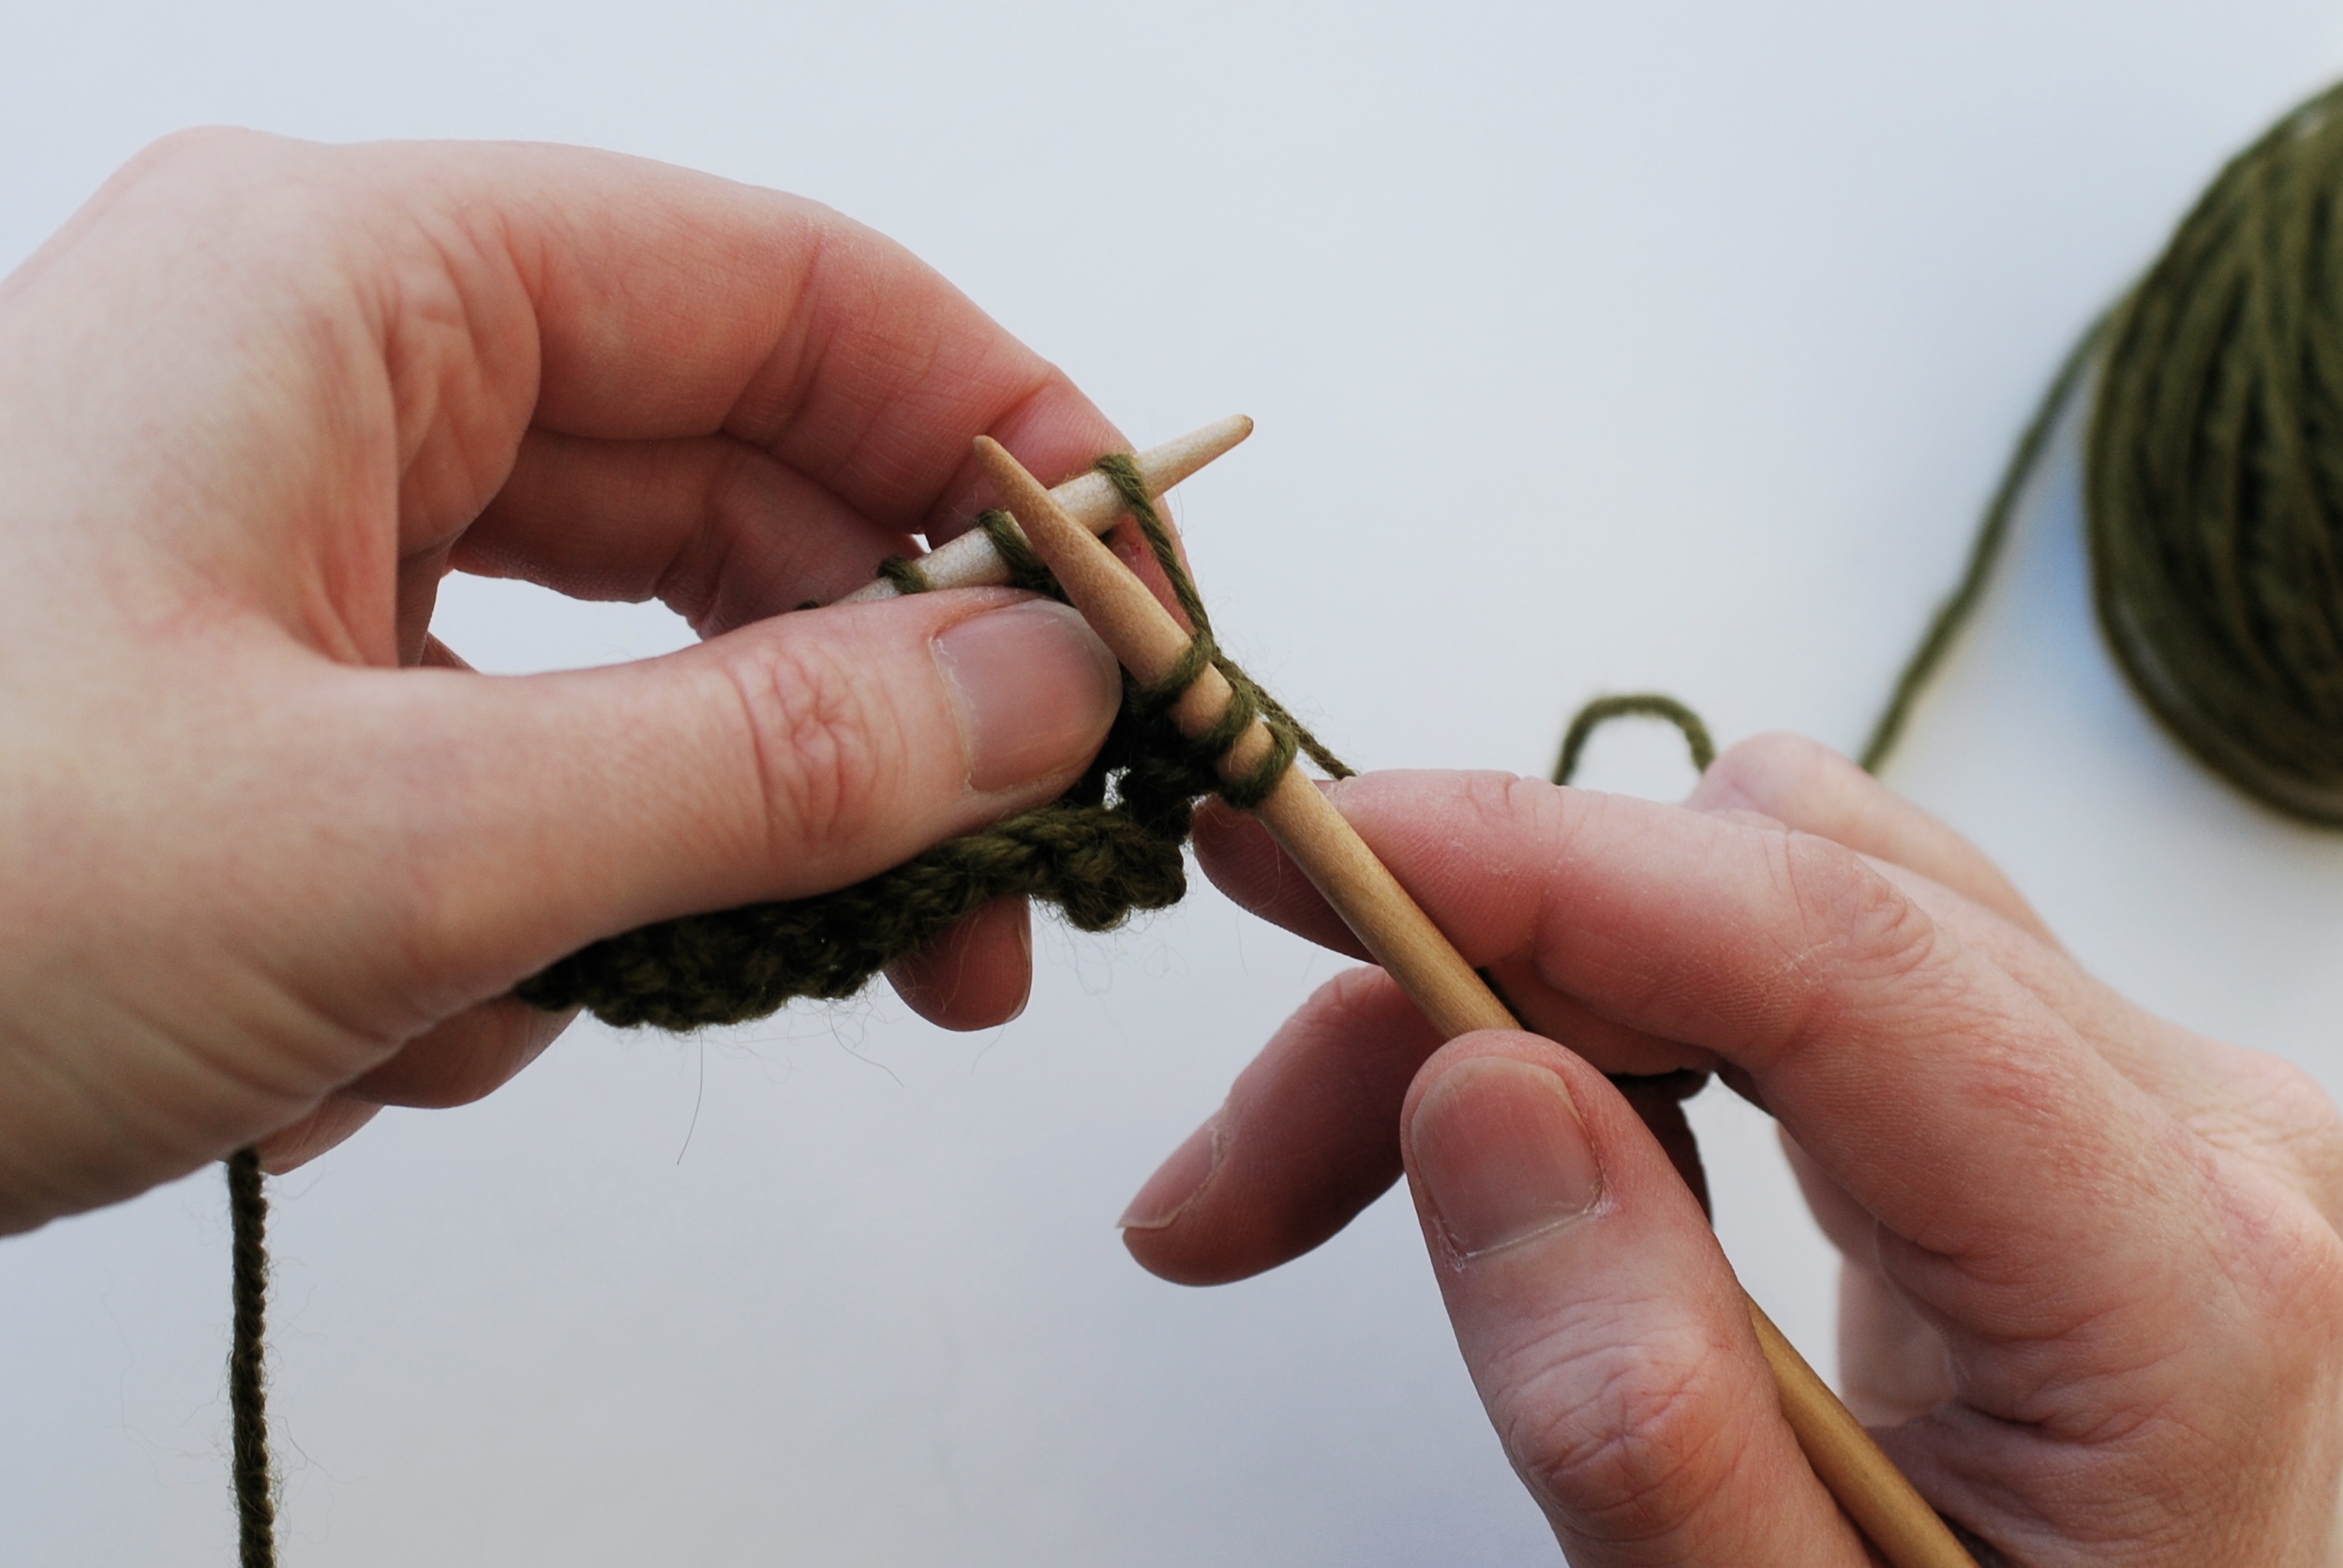
1. Knit stitch in the usual way, but do not slip off the LH needle.
2. Move your RH needle round to the back of the LH needle and insert it into the back of the loop left on the needle.
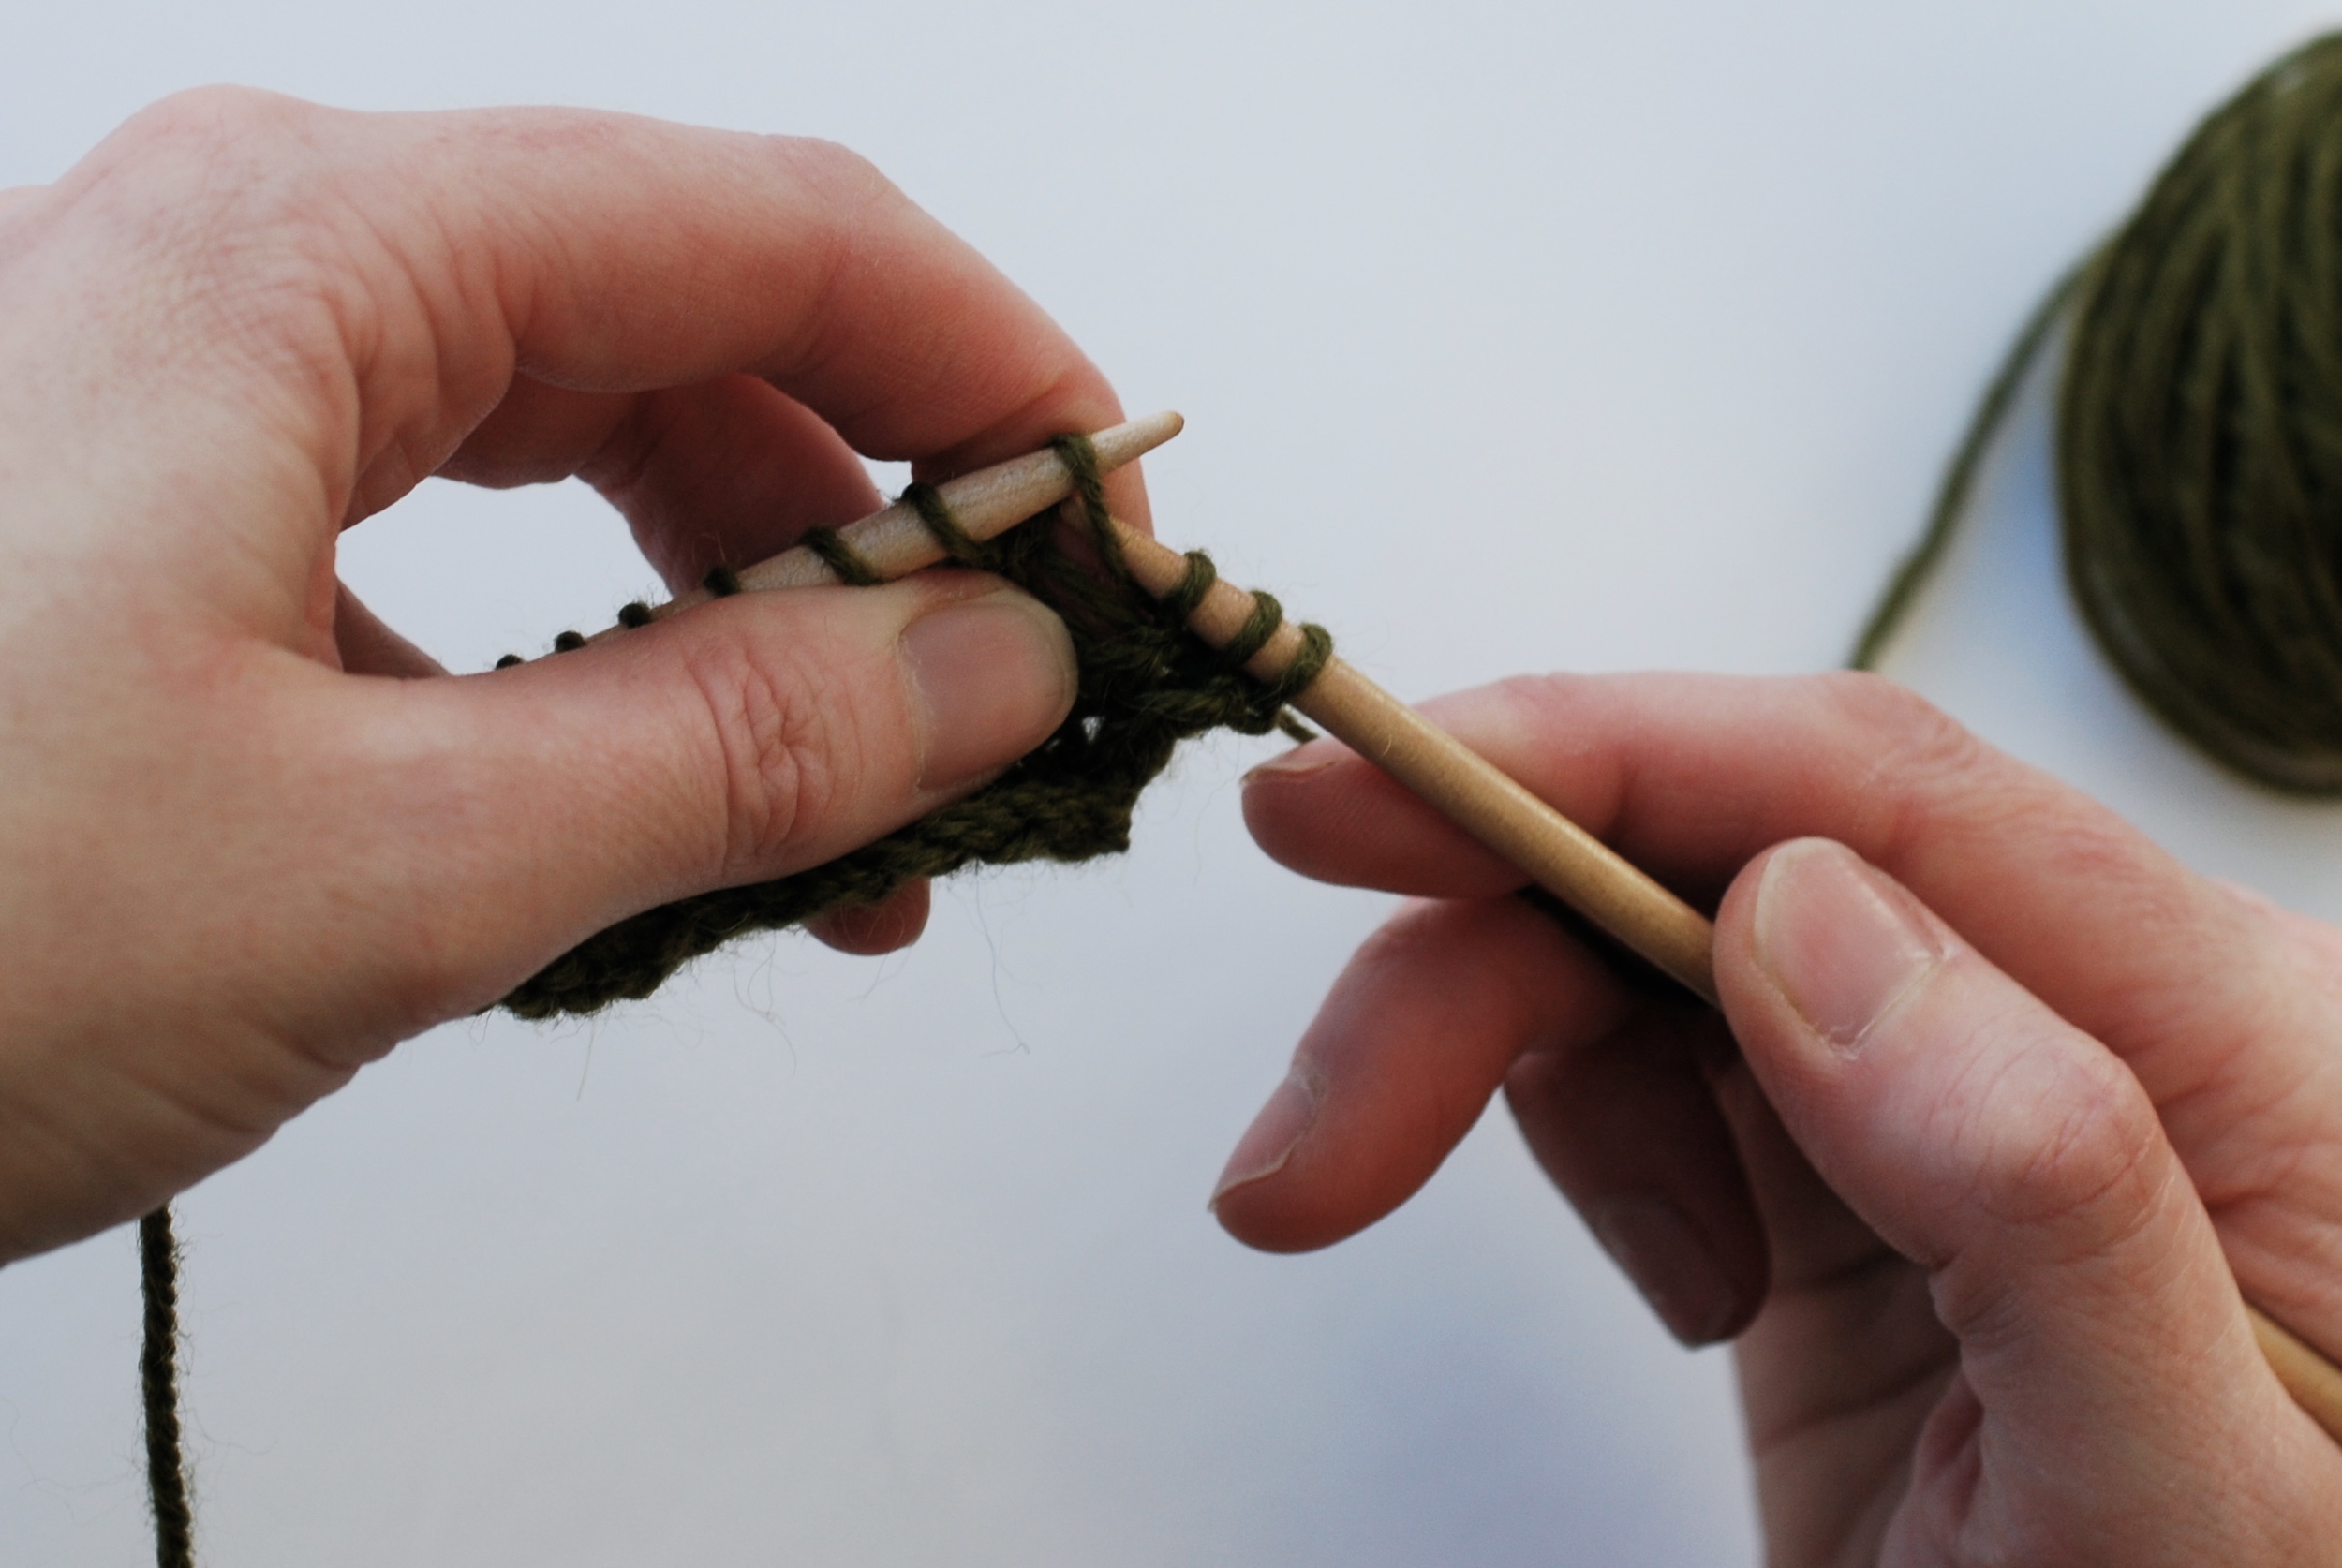
3. Knit.
4. This time, slip the loop off LH needle after knitting.
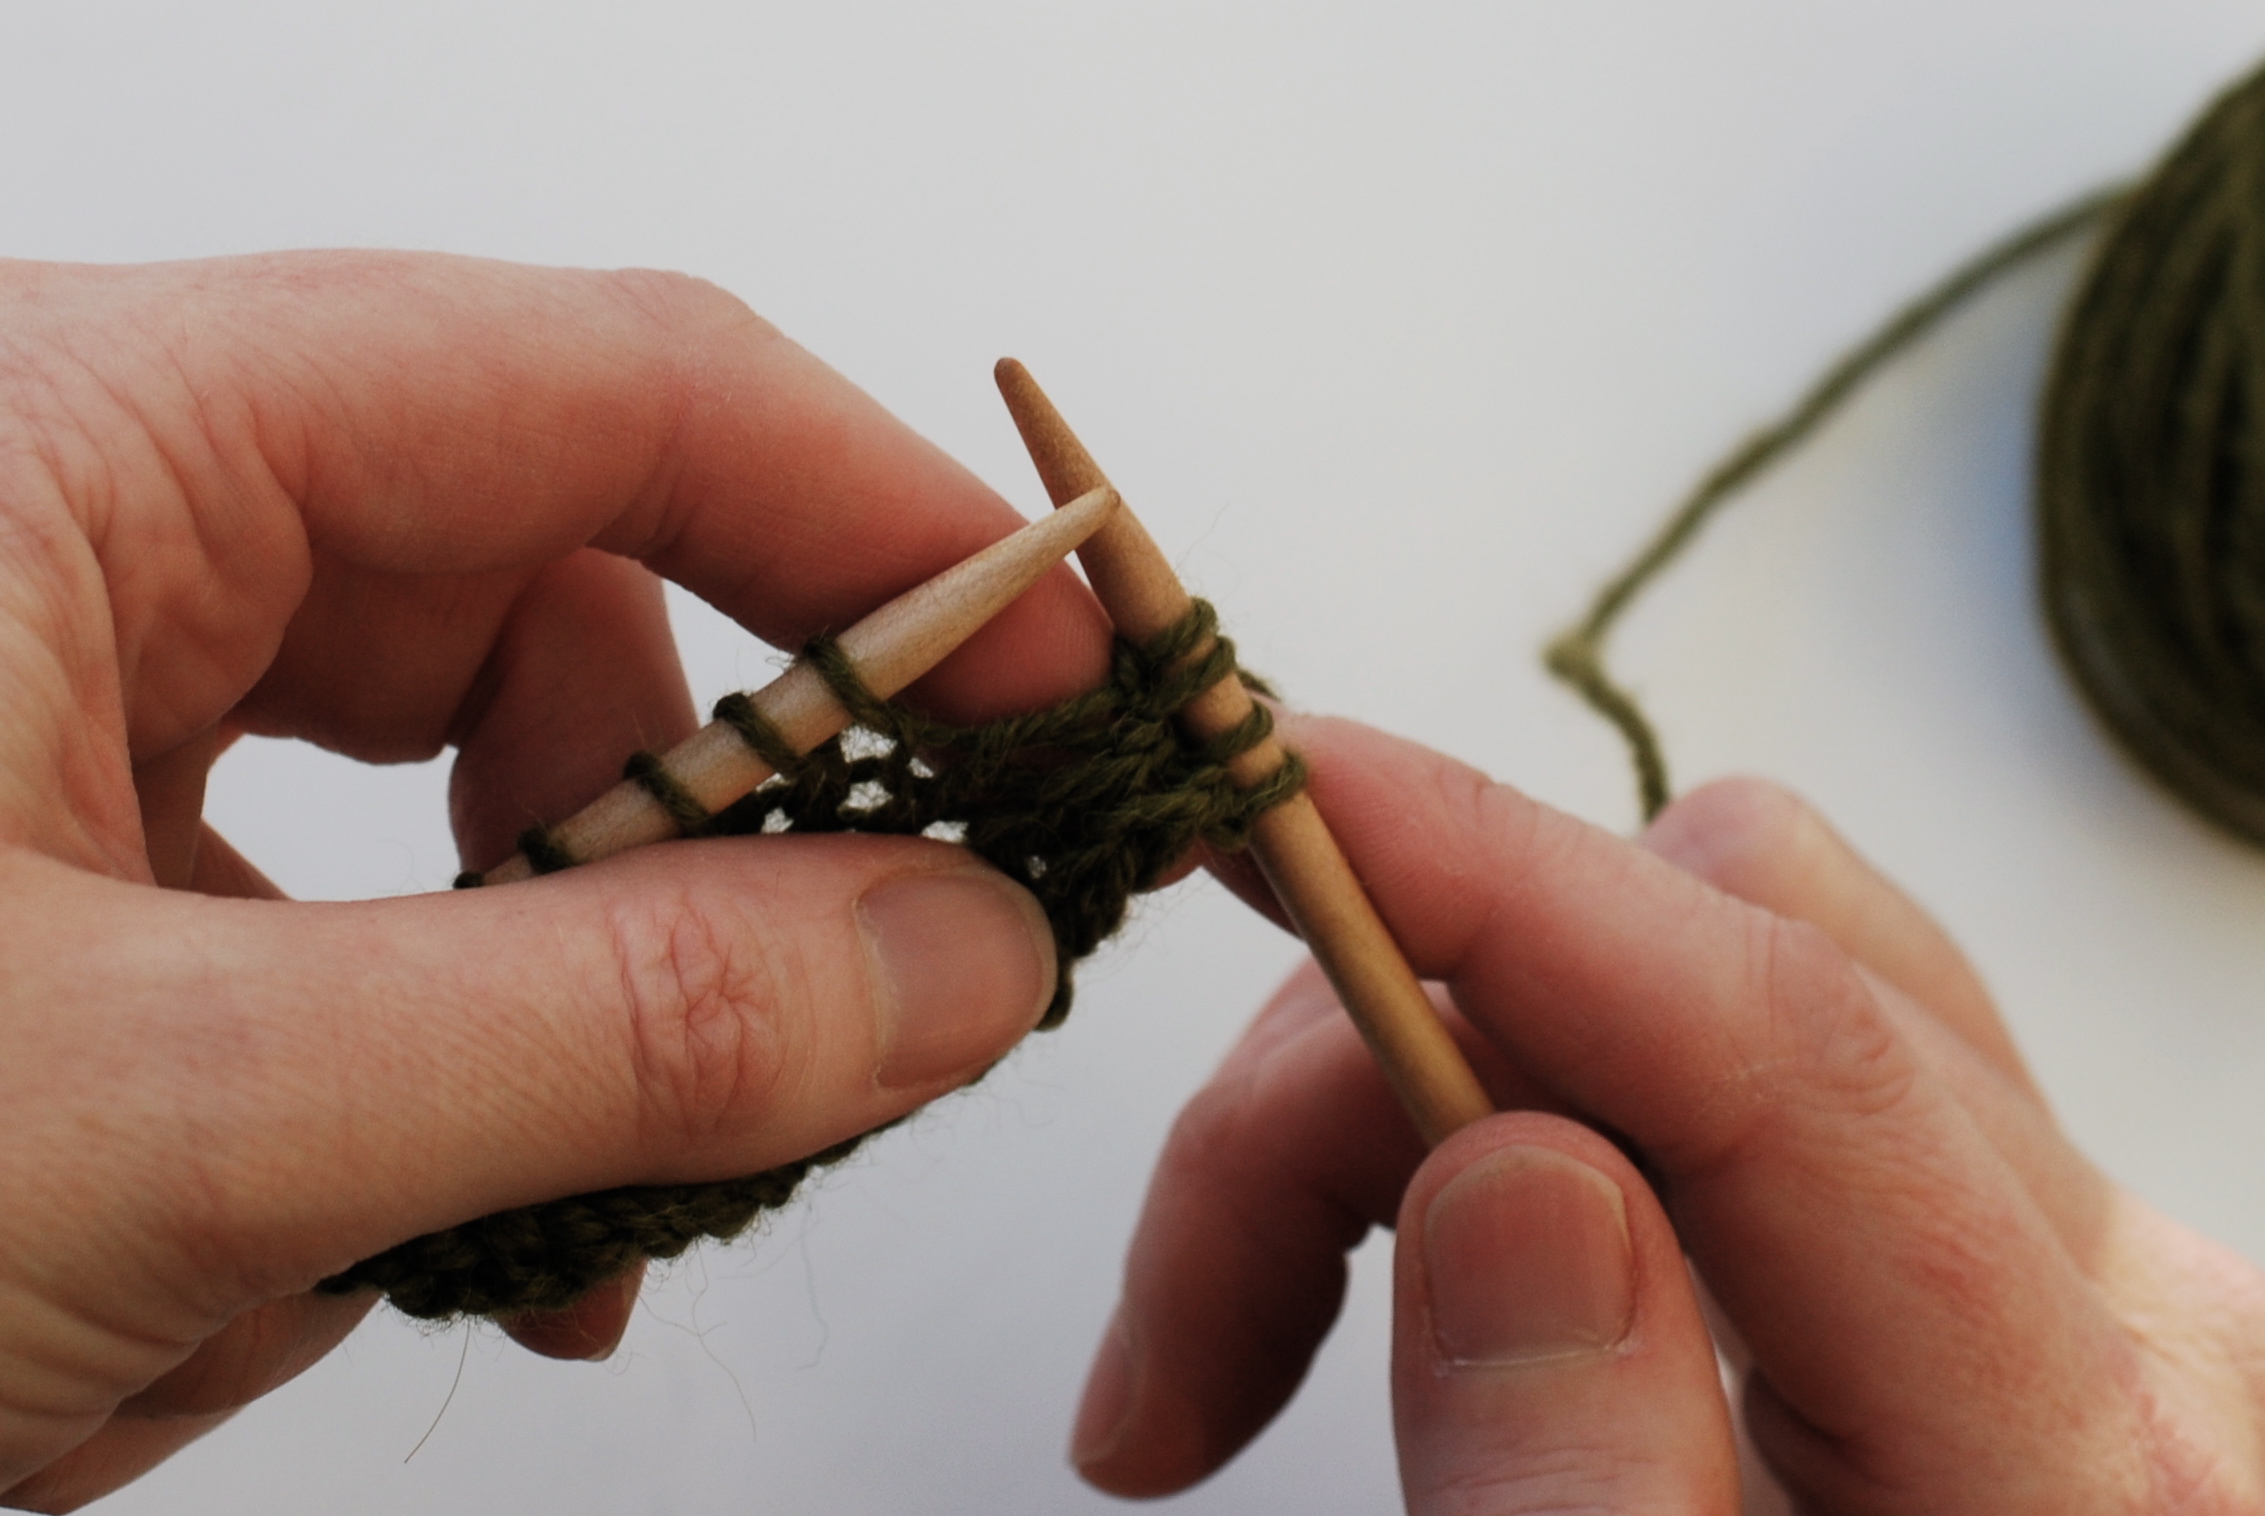
An extra stitch will appear on RH needle.
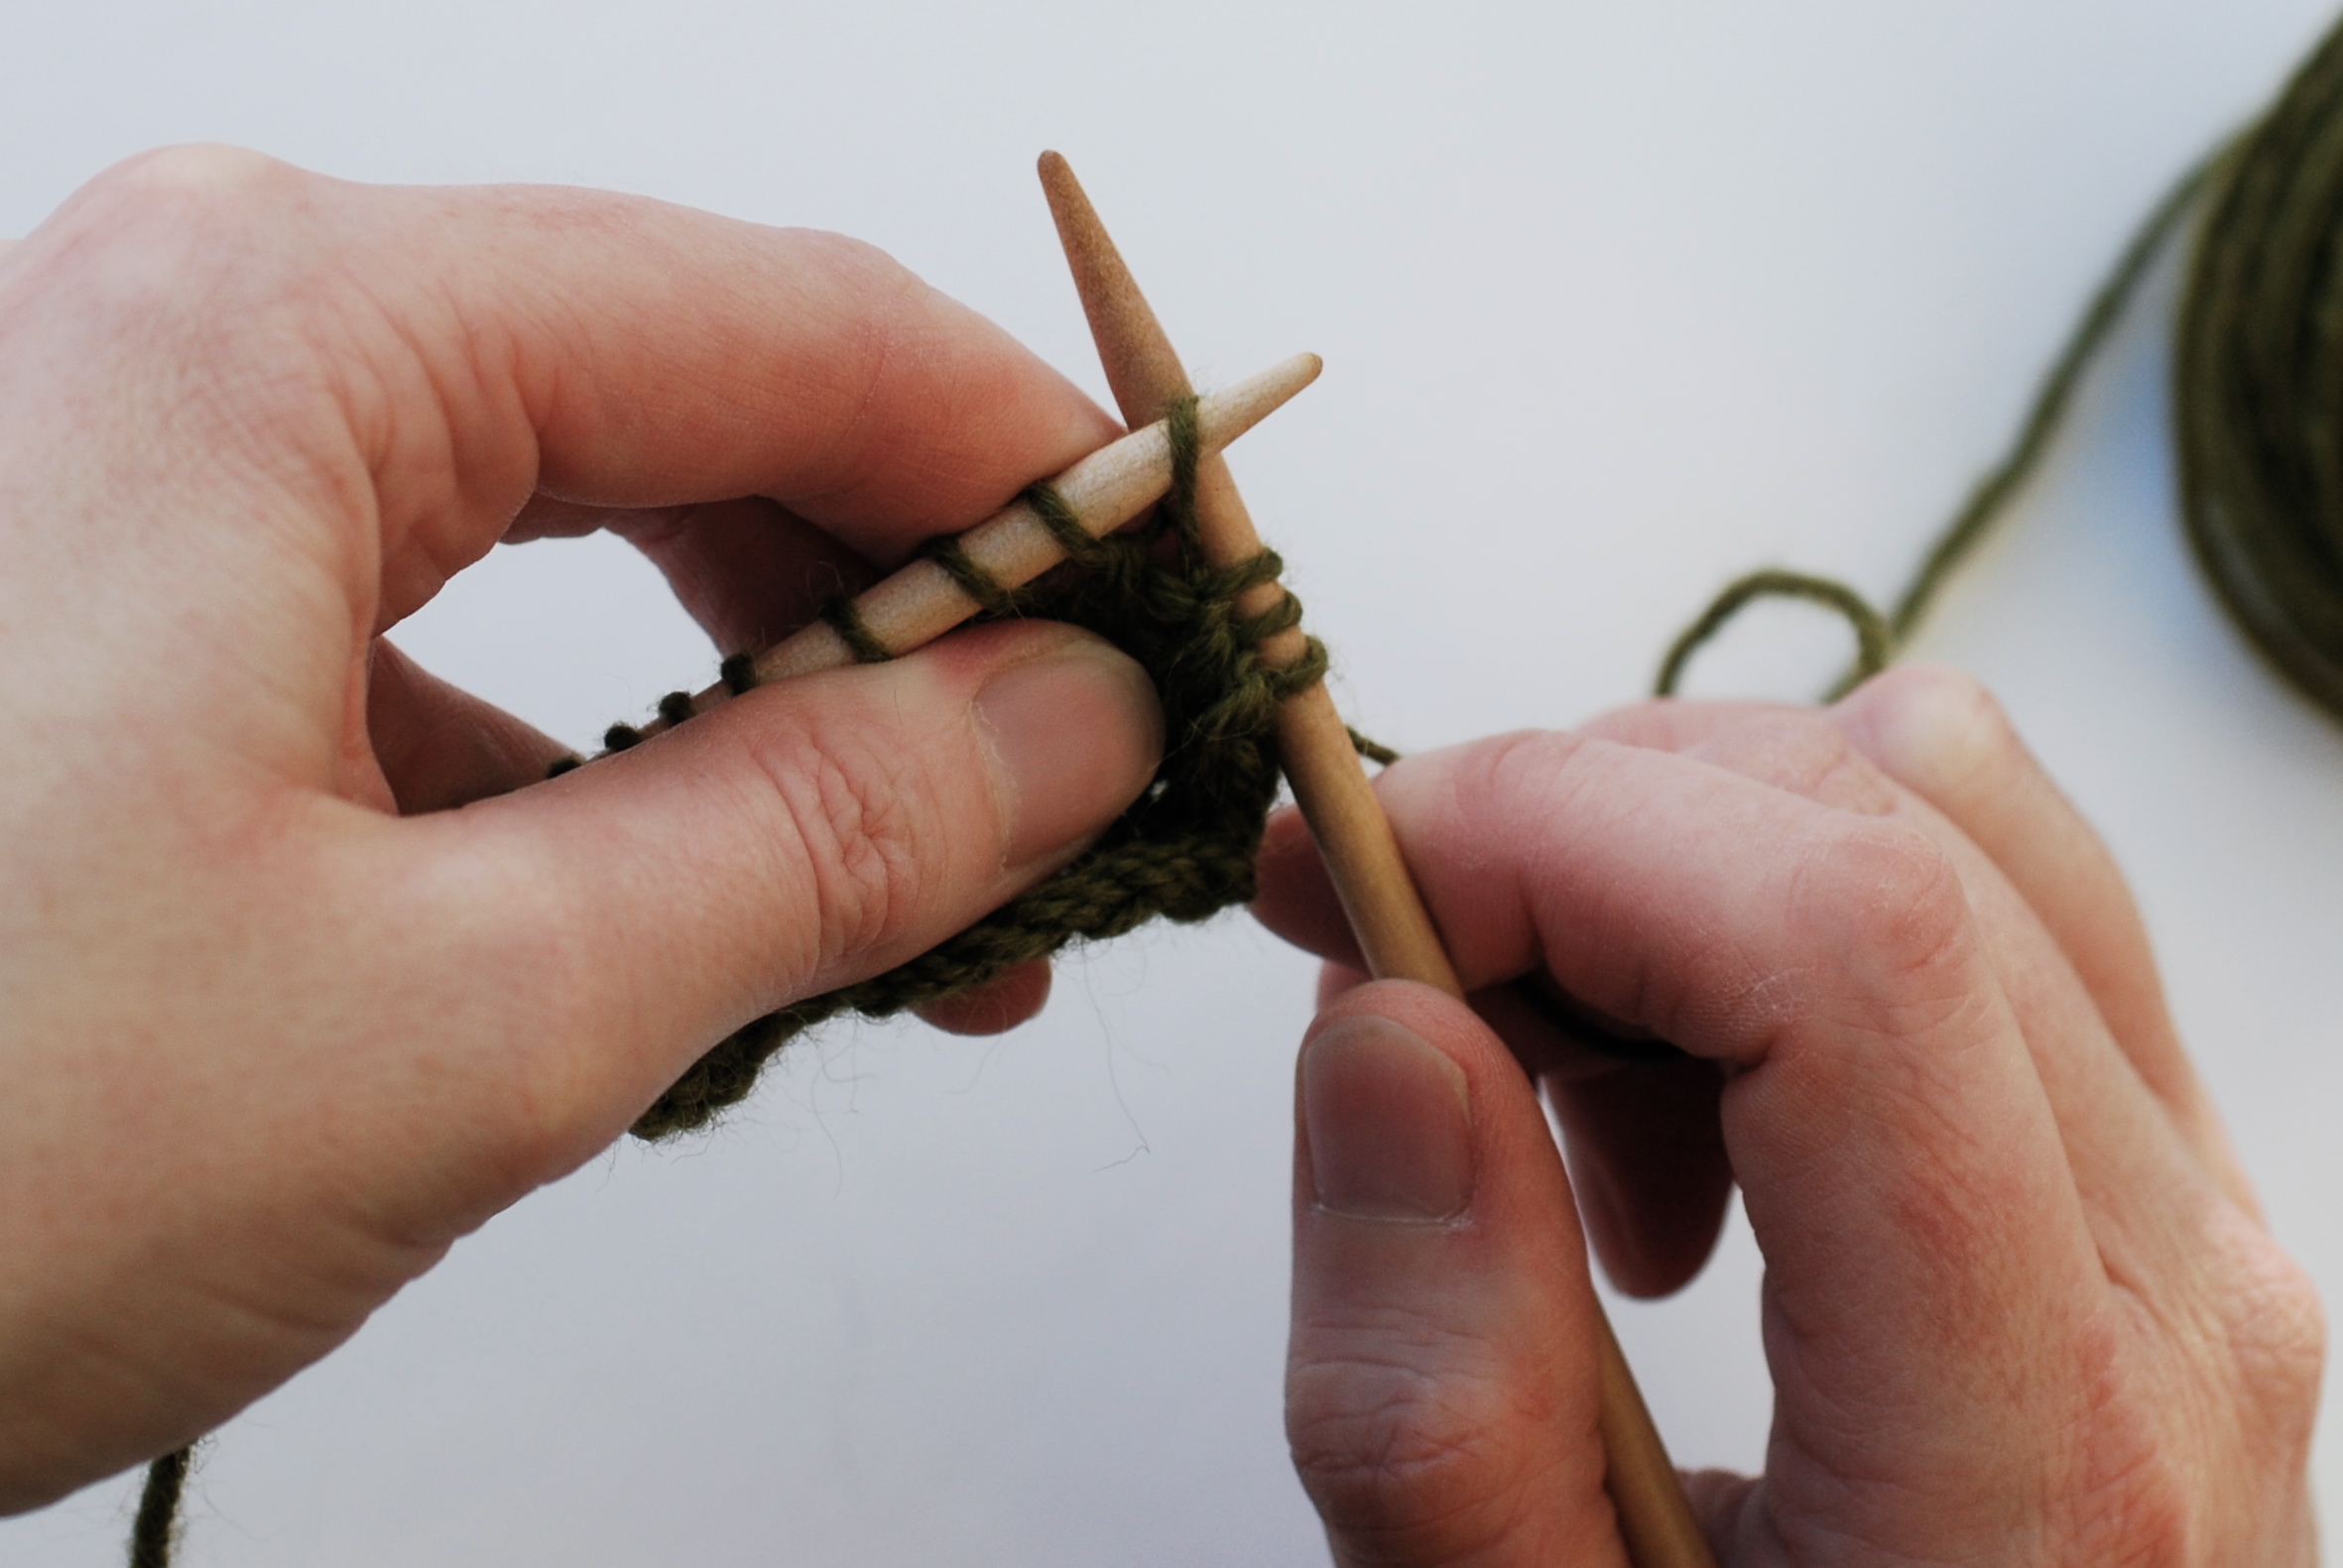
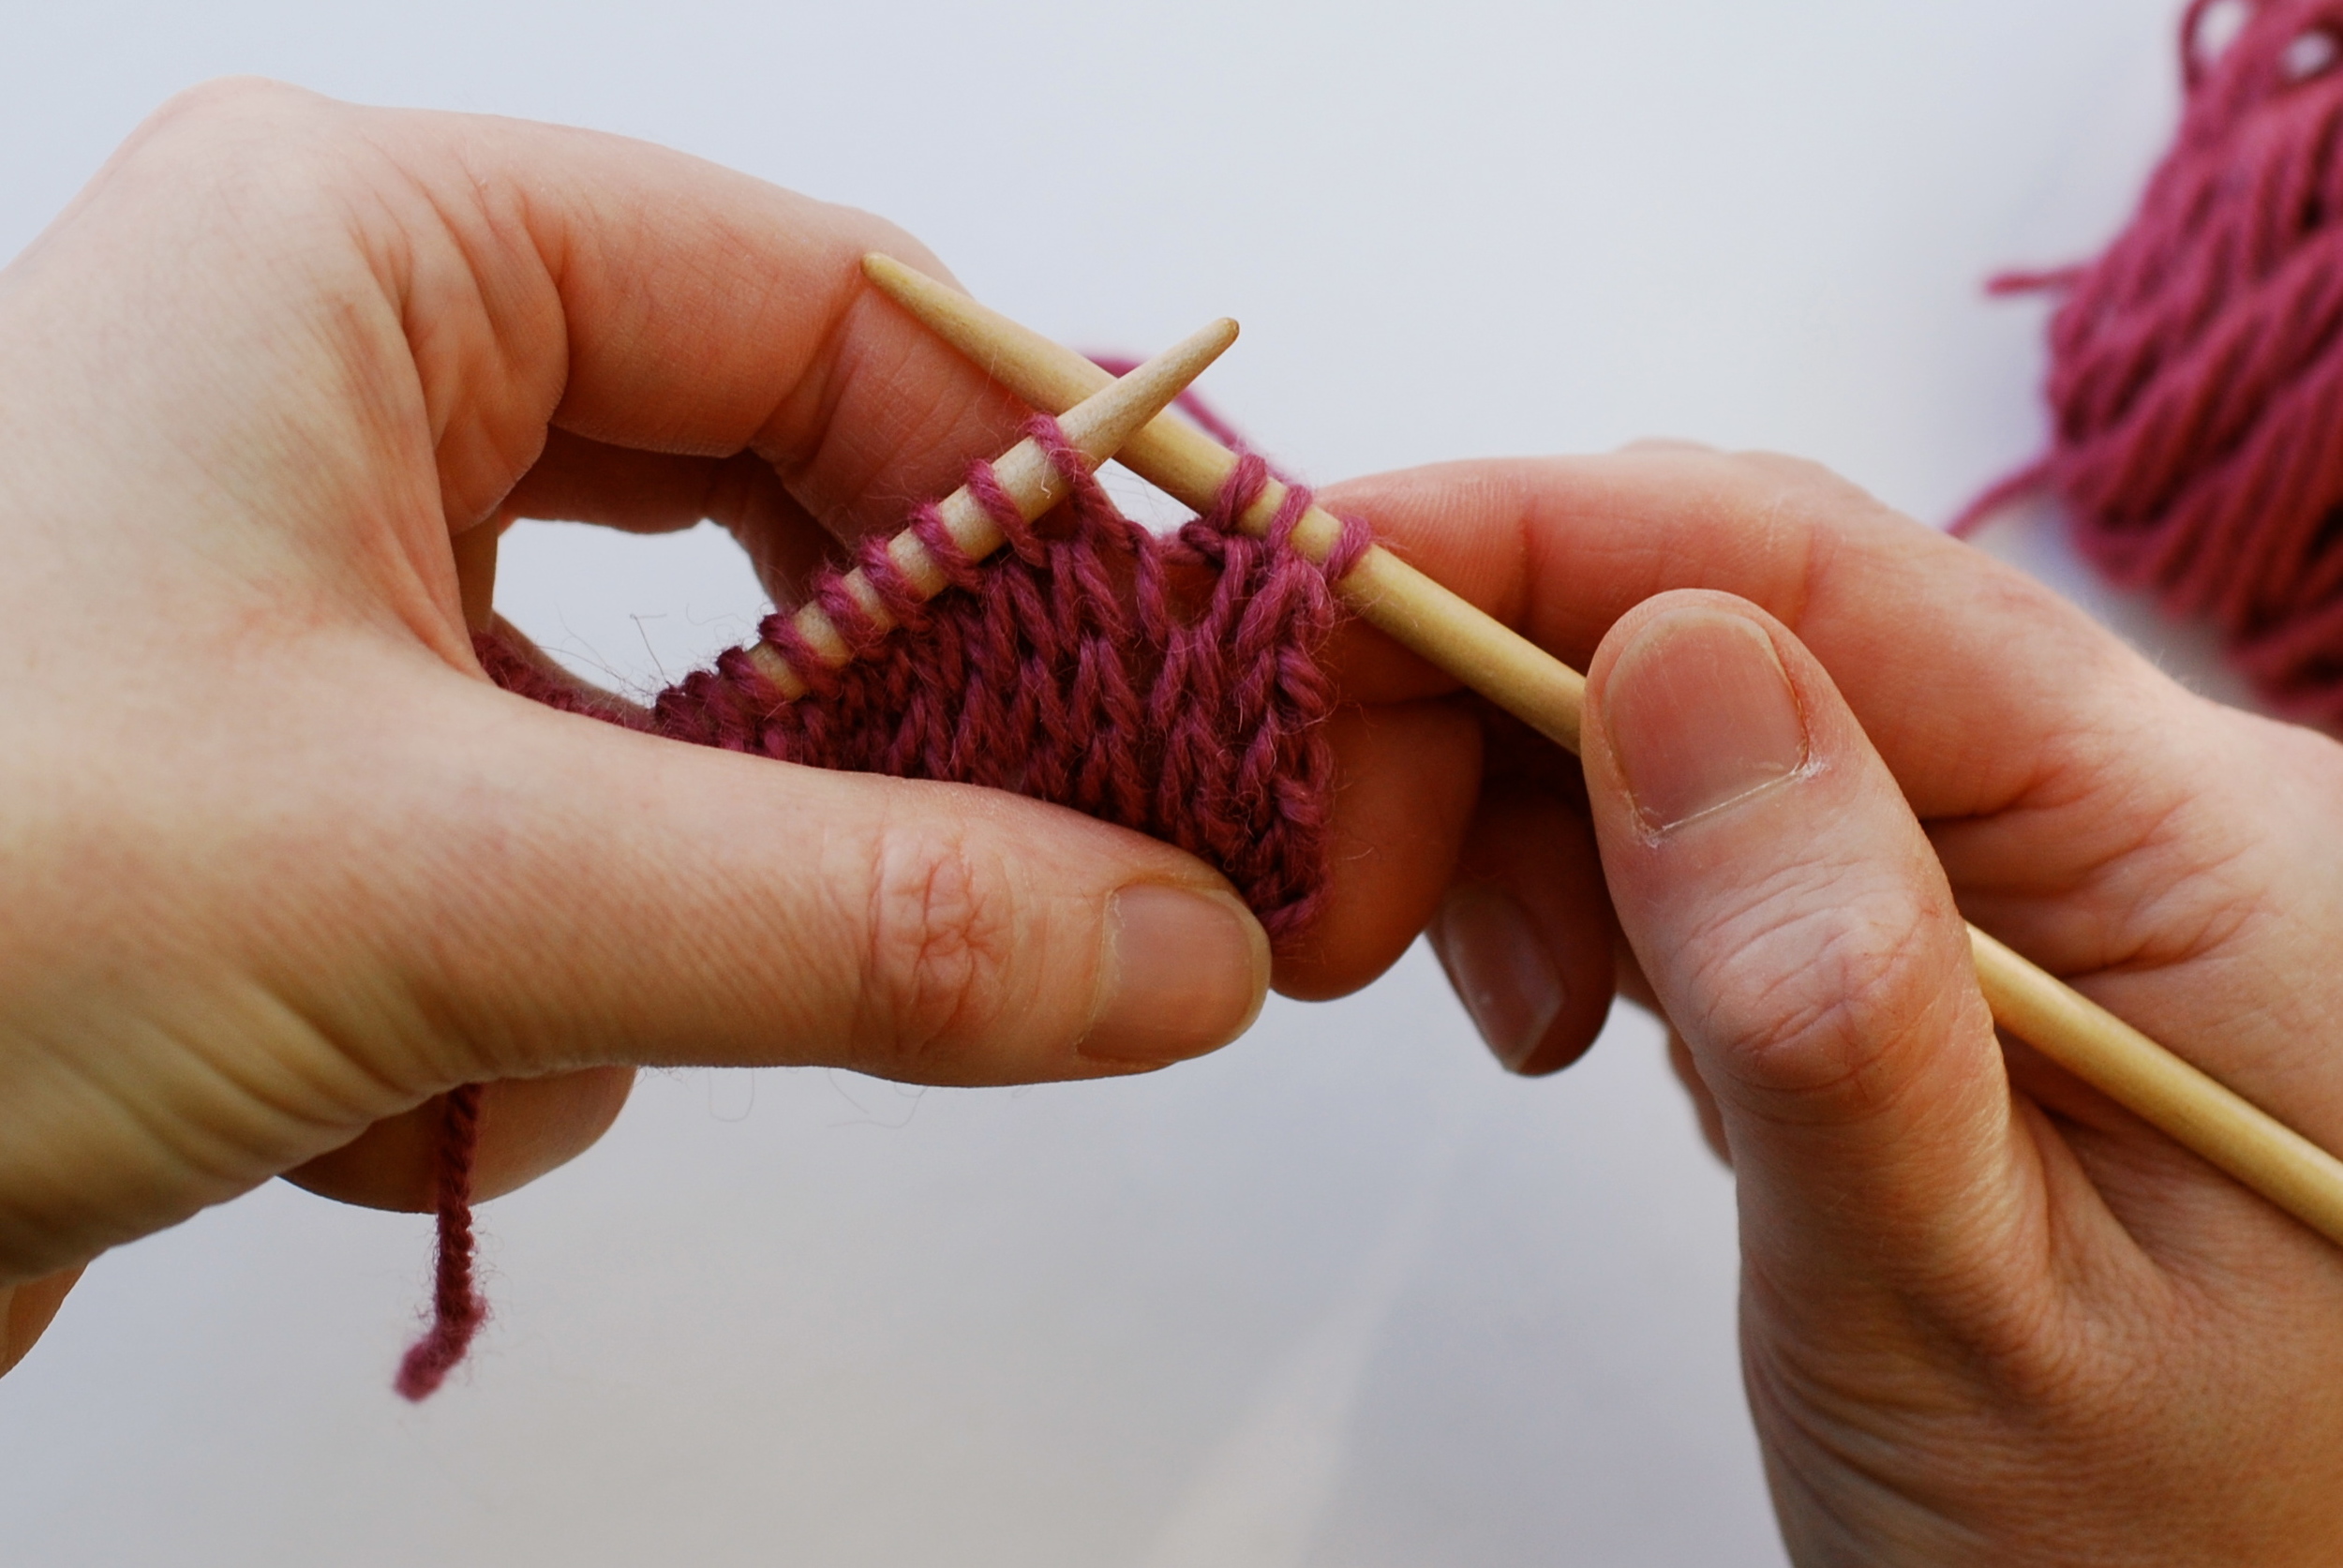
Increasing by making a new stitch (M1)
Use this method where you are working in st st and want your new stitch to look as invisible as possible. After working one or two rows after this method, the new stitch will blend in, appearing as an extra ‘V’ between 2 previous stitches. The new stitch appears between the stitch you have just worked and the next stitch, so it is easy to place it symmetrically. You cannot work a M1 at the beginning and end of a row. You always have to do it after the first stitch and before the last st. This method is often used to create a three dimensional aspect to your fabric, space out evenly along a row, so for example, the row might look like this:
Row 1: (K4, M1) rep to last 4 sts, K4.
The M1 technique cannot be used on the very first row of a fabric. If you need to increase on your first row, you need to use the kfb technique.
I have done this tutorial by increasing 2 sts in from the right hand side of work, just because it looks clearer.
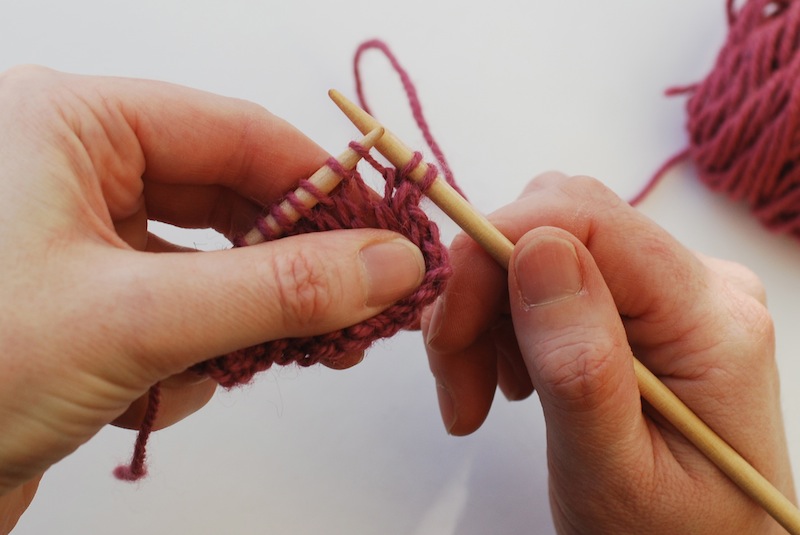
1. At the point where you want your extra st, pick up the loop in the row below between the st on your RH needle and the st on your LH needle. If you can’t see this loop the gently pull your RH needle away from the LH needle and it will appear more easily. Place this loop on your LH needle.
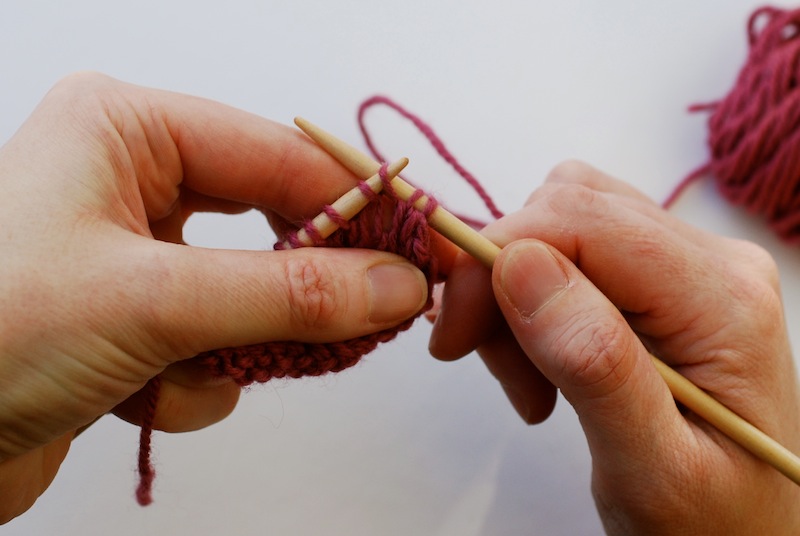
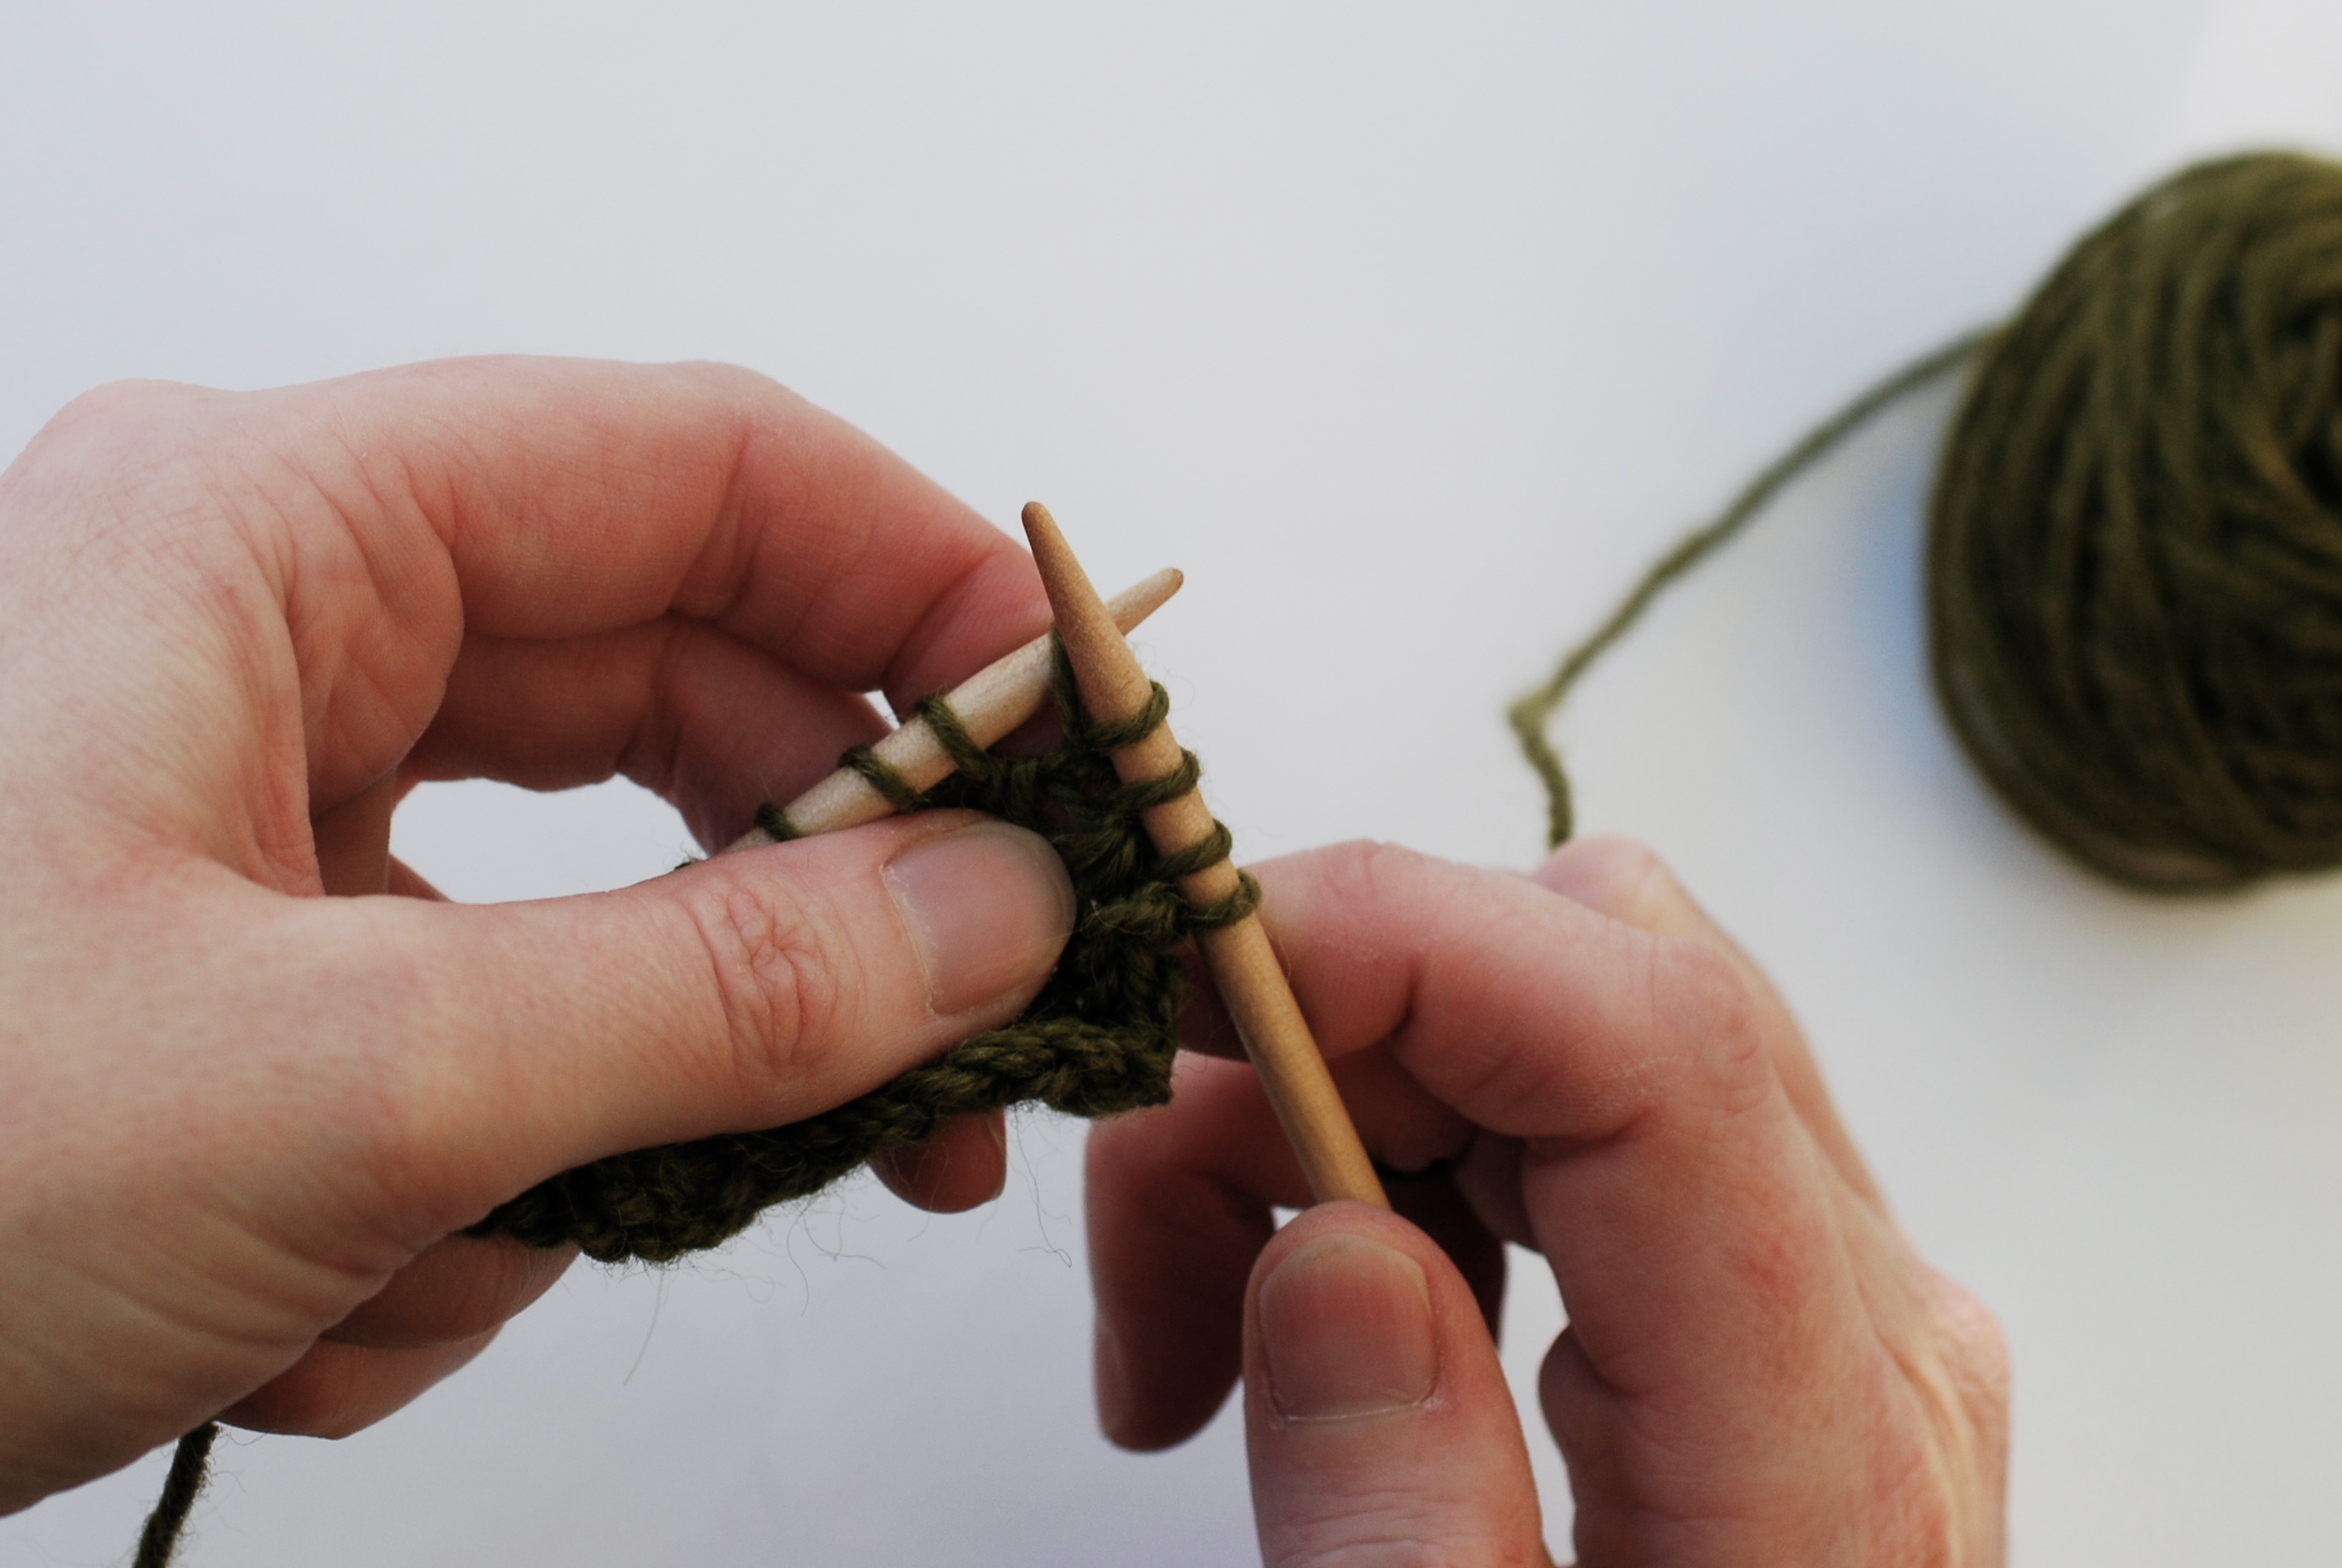
3. Knit into the back of the loop and drop the loop from the LH needle. It is important to knit into the back, as knitting into the front will create a hole.
4. An extra stitch will appear on your RH needle.