
Week 1: Knit
Ok. You've got your needles and yarn. You have cast on and now comes the moment of truth: Knitting. At a most basic level, knitting is only 2 stitches: Knit and Purl. Yes, there are other things you can do, but knit and purl are the building blocks of knitting.
The posts today and tomorrow will show you both English Style (yarn held in the right hand) and Continental Style (yarn held in the left hand). In my experience, crocheters learning to knit will often find that it is easier if they hold the yarn in the same hand for knitting as crochet, so if you are right handed, this means holding the yarn in your left, aka Continental. That said, if you have learned to knit before and are in the UK, you probably were taught English Style. Both are absolutely the right way and both have their benefits and drawbacks. Importantly, do what feels comfortable to you.
English Style: Knit
Holding the Yarn and Needles:
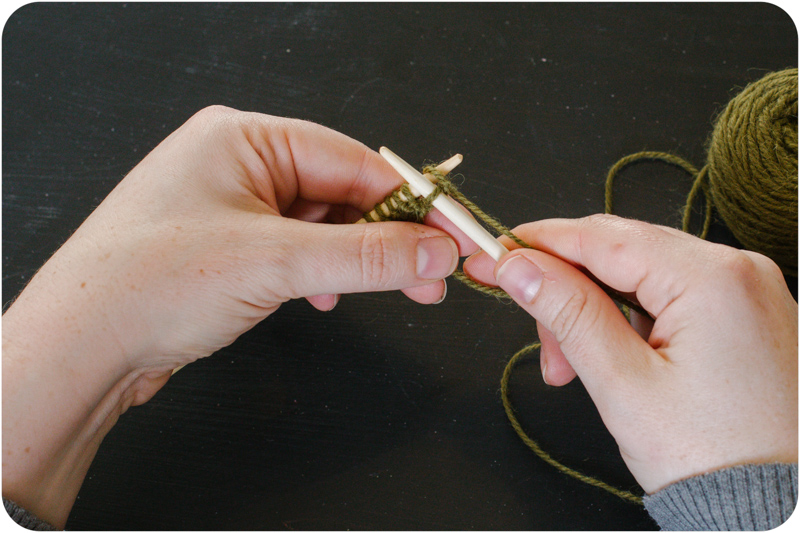
Hold the needle with your cast on stitches in your left hand and your empty needle with your right. The working yarn should be at the right side of your stitches. In English Style Knitting, the yarn is held in your right hand. Usually, you will thread the yarn through your fingers to keep tension in the yarn. How you do this is entirely up to you.
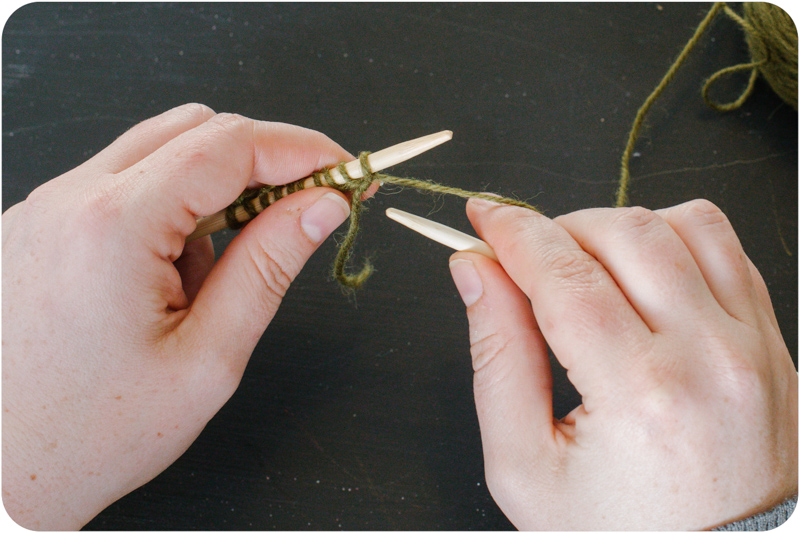
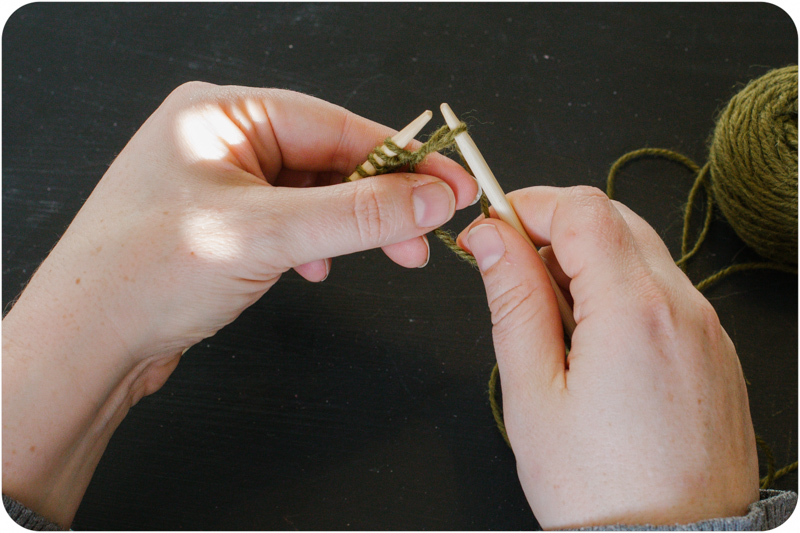
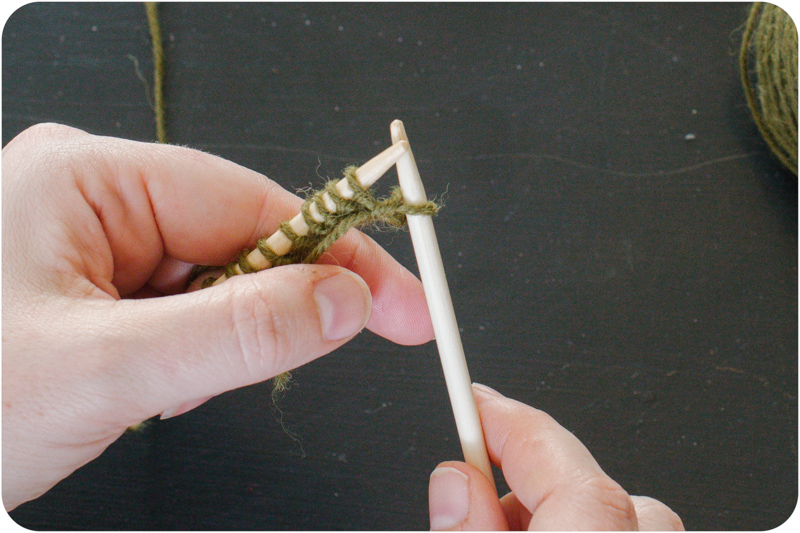
1. With your working yarn held to the back of your work, insert your right handed needle from front to back through the front leg of the first stitch on your left needle.
2. Bring your yarn under, around then over the top of the right hand needle. Initially, it may be easiest to hold both of the needles in your left hand and bring the yarn around with your whole hand. With time, may knitters can use just one finger to bring the yarn around the needle.
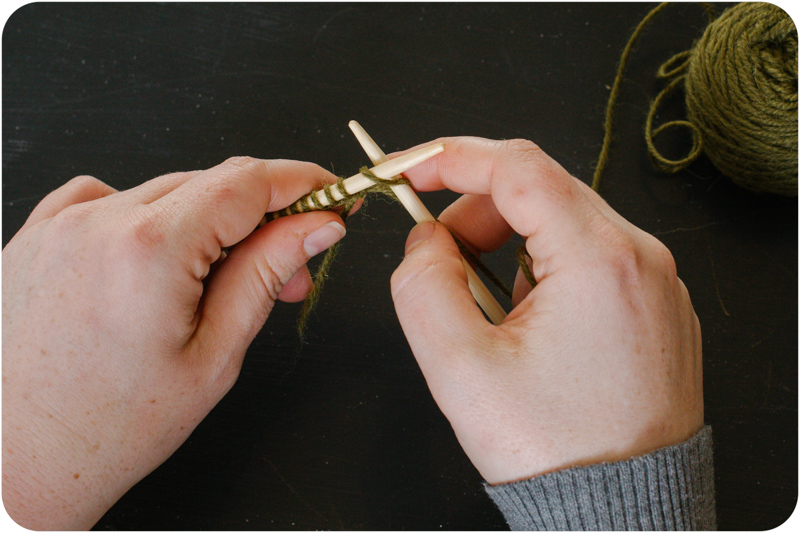
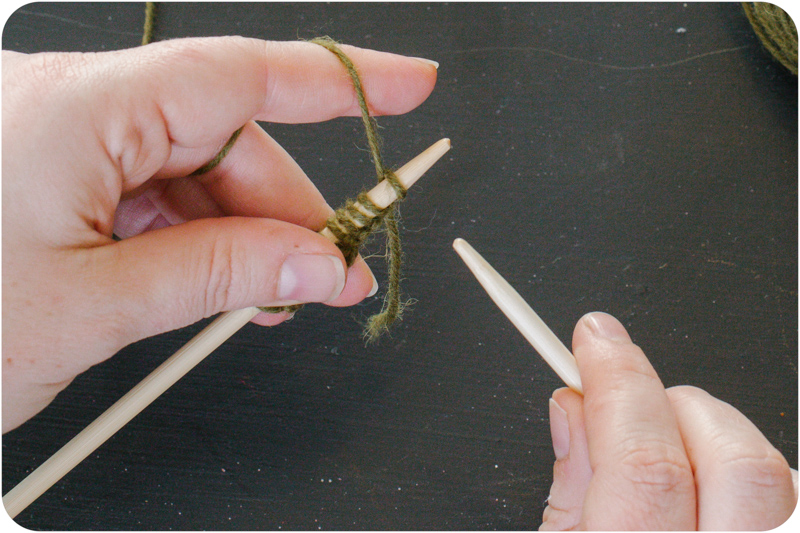
3. Using your right needle, pull the loop you just made on your right needle through the loop on your left needle.
4. Let the loop from that loop slide off the left needle. You should have 1 stitch on your right needle and 1 less stitch on your left needle.
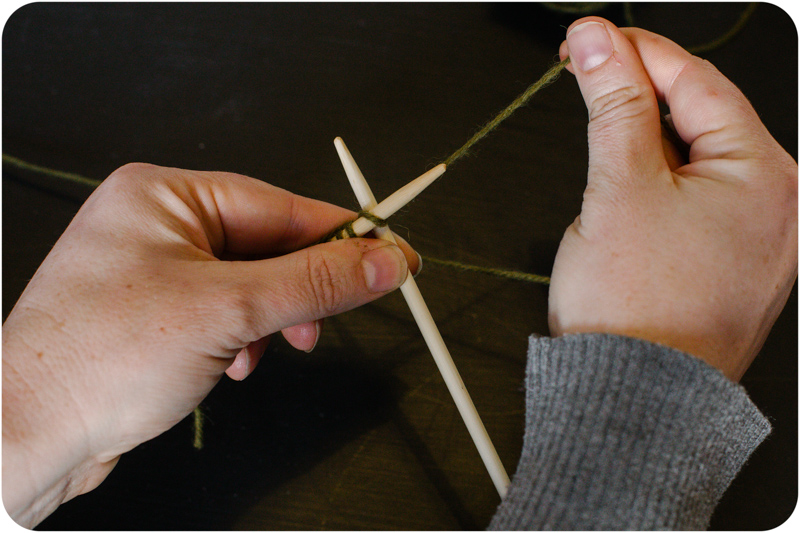
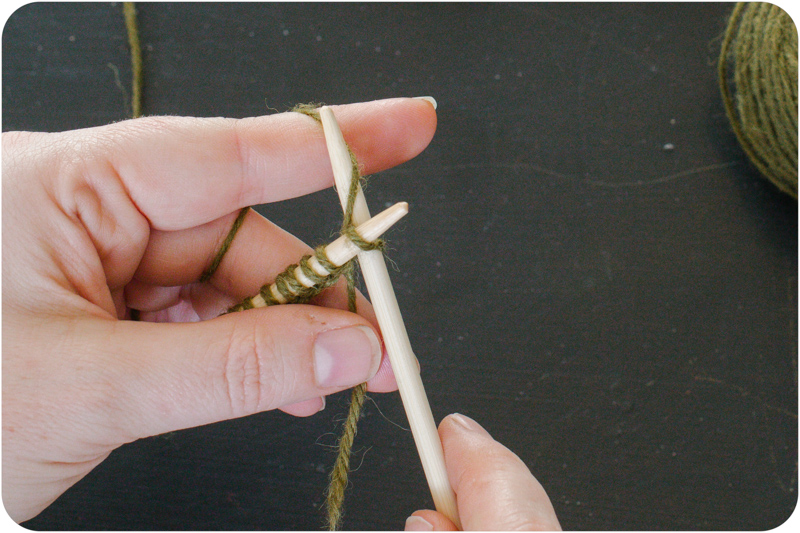
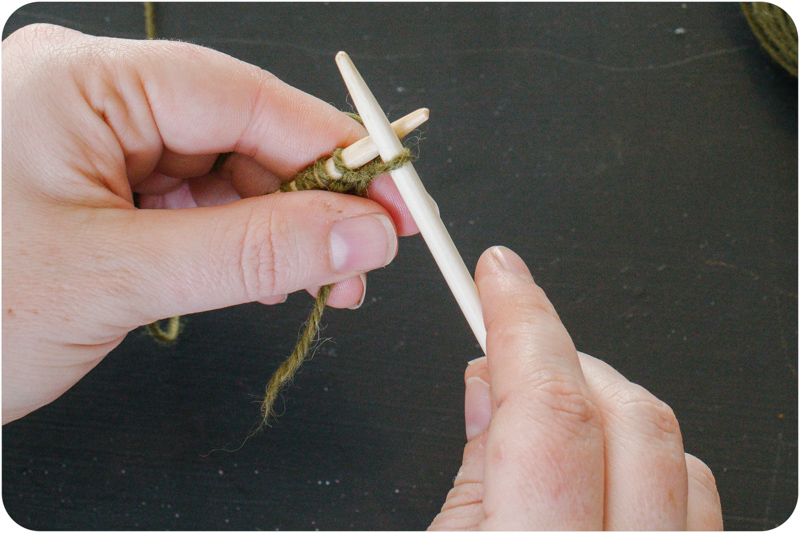
Repeat steps 1-3 for all of the stitches on your right hand needle or as many stitches as required. At the end of the row, all of your stitches will have been worked onto your right hand needle.
To continue onto the next row, you will turn your work, placing the needle with the stitches on it in your left hand and the working yarn to the right and side of your work.
Continental Style:
Holding the Yarn and Needles:
Hold the needle with your cast on stitches in your left hand and your empty needle with your right. The working yarn should be at the right side of your stitches. You will hold the working yarn in your left hand. Usually, you will thread the yarn through your fingers to keep tension in the yarn. How you do this is entirely up to you.
Knit

1. With your working yarn held to the back, insert your right handed needle from front to back through the front leg of the first stitch on your left needle.
2. Going over the top of your right needle, bring the yarn over and down.
3. Using your right needle, pull the loop you just made on your right needle through the loop on your left needle.
4. Let the loop from the left needle slip off as you move your new stitch further down the right needle. You should have 1 stitch on your right needle and 1 less stitch on your left needle.
Repeat steps 1-3 for all of the stitches on your right hand needle or as many stitches as required.
At the end of the row, all of your stitches will have been worked onto your right hand needle.
To continue onto the next row, you will turn your work, placing the needle with the stitches on it in your left hand and the working yarn to the right and side of your work.
Need more help? Check out these other videos and tutorials: